
As you've probably guessed by the title of my article, I still consider Ruby on Rails as a relevant technology that offers a lot of value, especially when combined with ReactJS as it's frontend counterpart. Here's how I approach the topic.
Have you ever faced a problem in your application where your search engine is a bit slow, even though your database is huge? Or maybe you wanted to add a facet search field in just a few minutes? If you encounter these problems and need a solution, then you are reading the right article! While it may be impossible to create an entire eBay-like application in its entirety, within an hour you can certainly create search engine and facets. This is where Blacklight comes in.
So what is Blacklight?
An open source Solr user interface discovery platform (what a mouthful!), Blacklight has highly-configurable Ruby on Rails front-end and can be used to enable the searching and browsing of your collections. Using the Apache Solr search engine to search full text and/or metadata, it’s really a powerful tool which helps us to connect Solr into Rails applications. It has a lot of features and extensions, but in this article, we will be focusing purely on faceted search. You can find more information about other features here.
What is Solr?
Solr is an open source search platform built in Java. It’s a popular search platform for the web because it can index and search multiple sites. It is designed for scalability and fast searching, whose major features are:
- Full-text search
- Faceted search
- Real-time indexing
- Database integration
- Rich documents handling (DOC, PDF)
What’s next?
Now we know something about Blacklight and Solr, let’s create our eBay clone – on which will sell computers! We will be able to perform a full text search then filter results with multiple facet fields, like:
- Condition (new, used)
- Screen Size (13.3 inches, 14 inches etc.)
- Format (buy now, auction)
- Price
- Category
- Brand
- Memory
Step 1 – Check installed Java version
For the first step, you need to have a version of Java already installed. You need to check that you have at least version 8.0:
$ java -version
java version "1.8.0_92"
Java(TM) SE Runtime Environment (build 1.8.0_92-b14)
Java HotSpot(TM) 64-Bit Server VM (build 25.92-b14, mixed mode)
If you have a different version, you need to update it to Java 8, which you can download from the official download page.
Step 2 – Install a Solr client
When installing Solr, we recommend choosing version 5.5.0. This is because anything 5.0+ doesn’t require any other Java servers like Tomcat or JBoss. To install it, we used brew package installer:
$ brew update
$ brew install solr55
After the installation process:
$ solr start
Wait up to 30 seconds to see Solr running on port 8983 [/]
Started Solr server on port 8983 (pid=20056). Happy searching!
If you don’t use OS X, you can find a lot of tutorials which show how to install Solr, for example here.
Your solr admin panel is available at http://localhost:8983.
Step 3 – Create a new Rails application
Now you need to create a new, empty Rails application. We used Rails 4.2.5. Let’s skip a test unit and set a database to MySQL.
$ rails new ebay-like --skip-test-unit --database=mysql
$ cd ebay-like
$ rake db:create
Step 4 – Create an item scaffold
The scaffold will keep all data. To create it, just run:
$ rails g scaffold Item title category_id:integer description:text condition:integer price:float format:integer brand_id:integer screen_size:float color:integer memory:integer --skip-assets
Running via Spring preloader in process 20573
invoke active_record
create db/migrate/20160619091806_create_items.rb
create app/models/item.rb
…
BrandID and CategoryID will be just an integers for now, which will point to hard-coded categories and brands in the Item class.But we won’t create ActiveRecord associated models. Right now, we are just focusing on Blacklight and SOLR.
Step 5 – Run migrations
Let’s migrate our database:
$ rake db:migrate
== 20160619091806 CreateItems: migrating ======================================
-- create_table(:items)
-> 0.0154s
== 20160619091806 CreateItems: migrated (0.0155s) =============================
Step 6 – Update the Item class
We’ve just created scaffolded Item model. From here, we can create a new item going through the http://localhost:3000/items/new, but first, let’s add some changes to our Item model. We need to validate all needed fields to be present, enumerate some of them and create two constants:
- one with available screen sizes
- second with memory sizes.
# app/models/item.rb
Step 7 – Update item’s form
Let’s also modify items’ form view:
# app/views/items/_form.html.erb
Step 8 – Install Blacklight
Ok, now you are able to create your items, but you can’t search for them yet! Let’s add the Blacklight gem!
# Gemfile
Bundle it, install Blacklight and migrate everything:
$ bundle install
$ rails generate blacklight:install
$ rake db:migrate
Step 9 – Create an empty Solr core
You have installed Blacklight in your application. Now you need an empty core, which you can create using:
$ solr create -c ebay_like
In Solr, the term core is used to refer to a single index and associated transaction log and configuration files (including the solrconfig.xml and Schema files, among others). Basically, it’s a place where we keep our data and search through it.
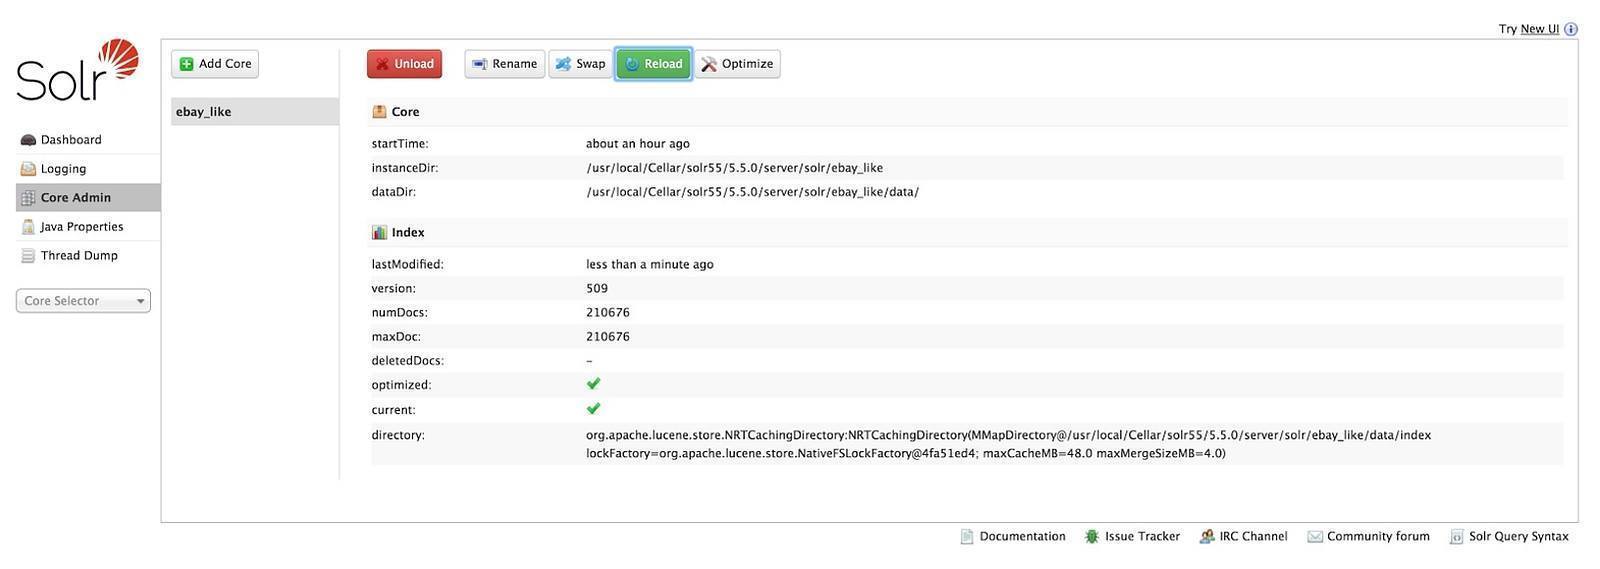
You can check to see if the command was successful by visiting the newly created core: http://localhost:8983/solr/#/~cores/ebay_like
Step 10 – Edit solrconfig.xml
Now you need to modify the solrconfig.xml (/usr/local/Cellar/solr55/5.5.0/server/solr/ebay_like) file. You don’t need to use managed schema, as you want to use classic schema.xml. To achieve it, first let’s add these lines:
<!--   <schemaFactory class="ManagedIndexSchemaFactory">
    <bool name="mutable">true</bool>
    <str name="managedSchemaResourceName">managed-schema</str>
  </schemaFactory> →
Above them, add:
<schemaFactory class="ClassicIndexSchemaFactory"/>
Then remove:
<processor class="solr.AddSchemaFieldsUpdateProcessorFactory">
      <str name="defaultFieldType">strings</str>
      <lst name="typeMapping">
        <str name="valueClass">java.lang.Boolean</str>
        <str name="fieldType">booleans</str>
      </lst>
      <lst name="typeMapping">
        <str name="valueClass">java.util.Date</str>
        <str name="fieldType">tdates</str>
      </lst>
      <lst name="typeMapping">
        <str name="valueClass">java.lang.Long</str>
        <str name="valueClass">java.lang.Integer</str>
        <str name="fieldType">tlongs</str>
      </lst>
      <lst name="typeMapping">
        <str name="valueClass">java.lang.Number</str>
        <str name="fieldType">tdoubles</str>
      </lst>
    </processor>
You can download it from here.
Step 11 – Edit schema.xml
Finally, remove the managed-schema file and create the schema.xml in the same folder as solrconfig.xml is localized. Just paste the ready-made file from here. We recommend just extending a default schema.xml file then adding a few custom fields:
   <field name="title" type="string" indexed="true" stored="true"/>
    <field name="description" type="text_en" indexed="true" stored="true" multiValued="false"/>
    <field name="price" type="float" indexed="true" stored="true" multiValued="false"/>
    <field name="category" type="string" indexed="true" stored="true" multiValued="false"/>
    <field name="brand" type="string" indexed="true" stored="true" multiValued="false"/>
    <field name="condition" type="string" indexed="true" stored="true" multiValued="false"/>
    <field name="screen_size" type="string" indexed="true" stored="true" multiValued="false"/>
    <field name="color" type="string" indexed="true" stored="true" multiValued="false"/>
    <field name="memory" type="string" indexed="true" stored="true" multiValued="false"/>
    <field name="format" type="string" indexed="true" stored="true" multiValued="false"/>
Step 12 – Reload Solr’s core
Everything is read. After all changes go to http://localhost:8983/solr/#/~cores/ebay_like and press the ‘Reload’ button. Your core will be reloaded.
Step 13 – Edit config/blacklight.yml
In this file, you just need to point to your core.
Step 14 – Create a wrapper between Rails and Solr
Now we need to connect Solr with our Rails application. We wrote our own wrapper which connects with Solr – for now Blacklight doesn’t include it.
Add a new class in under the app/models/solr_service.rb:
Step 15 – Modify the Item class
You are able to establish a connection between Rails and SOLR, but you need to store data into SOLR – how? You can do this during a model creation/update. Send a request to SOLR while you create, update or destroy a record. For creating and updating, there is the self.add method. To remove a document, we will use the self.delete_by_id. For our needs, callbacks would be a great idea! We will add two filters, after_commit and before_destroy.
After the commit callback will be used when a record will be saved via Rails and SQL query is fully done. The before_destroy callback is used before Rails runs the destroy method and SQL query is done. So let’s write some code…
Add these two callbacks to the Item class:
To_solr method formats a record’s data into a hash, which looks like this:
{"title"=>"MacBook Pro",
 "description"=>"SIlver notebook",
 "price"=>1200.0,
 "category"=>"Ultrabook",
 "brand"=>"Apple",
 "item_condition"=>"Brand New",
 "item_format"=>"Buy Now",
 "screen_size"=>15.4,
 "item_color"=>"Silver",
 "item_memory"=>8,
 "id"=>1}
Step 16 – Fill a database with a sample data
Ok, let’s add a few records to the database. To do so, hit http://localhost:3000/items.
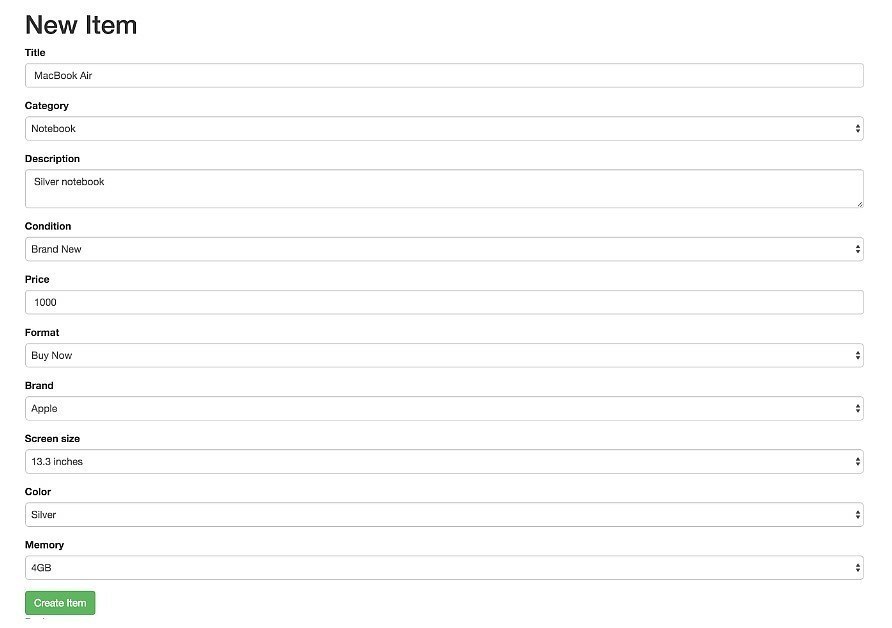
Here is the data we have, which we added to the database and Solr:
  [{"title"=>"MacBook Pro",
  "description"=>"test query",
  "price"=>1200.0,
  "category"=>"Ultrabook",
  "brand"=>"Apple",
  "condition"=>"Brand New",
  "format"=>"Buy Now",
  "screen_size"=>"15.4 inches",
  "color"=>"Silver",
  "memory"=>"8GB",
  "id"=>1},
 {"title"=>"MacBook Air",
  "description"=>"Silver notebook",
  "price"=>1000.0,
  "category"=>"Notebook",
  "brand"=>"Apple",
  "condition"=>"Brand New",
  "format"=>"Buy Now",
  "screen_size"=>"13.3 inches",
  "color"=>"Silver",
  "memory"=>"4GB",
  "id"=>2}]
Step 17 – Change CatalogController config
Now, you need to make small changes in the app/controllers/catalog_controller.rb file. Let’s comment everything in the configure_blacklight block, except:
config.default_solr_params = {
rows: 10
}
config.add_facet_fields_to_solr_request!
config.add_search_field 'all_fields', label: 'All Fields'
The full file is here.
Step 18 – Let’s test our search engine!
It’s time to put it to the test. Let’s search for a notebook!
Search for the phrase ‘Air’.
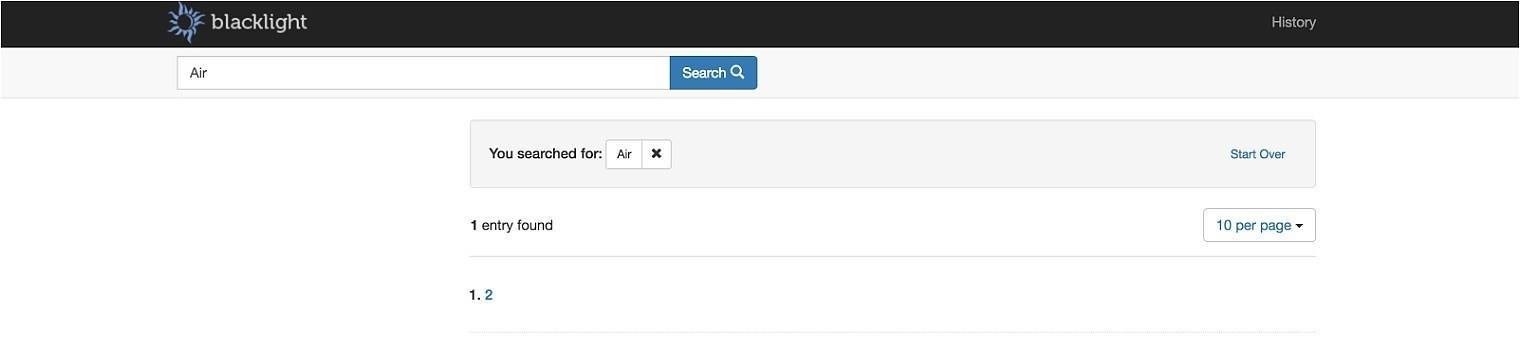
An entry has been found! Wuhoo! Our search is working…
Step 19 – Add facets
Filtering items is not so easy. You need to add a few facets to your UI. This also means you miss item info in a search results. In the app/controllers/catalog_controller.rb, you should define facets and index fields:
config.add_facet_field 'category', label: 'Category'
config.add_facet_field 'brand', label: 'Brand'
config.add_facet_field 'condition', label: 'Condition'
config.add_facet_field 'format', label: 'Format'
config.add_facet_field 'screen_size', label: 'Screen size'
config.add_facet_field 'color', label: 'Color'
config.add_facet_field 'memory', label: 'Memory'
config.add_facet_field 'price', label: 'Price', query: {
to_1000: { label: 'from $0 to $1000', fq: "price:[0.0 TO 1000.0]" },
from_1000_to_2000: { label: 'from $1000 to $2000', fq: "price:[1000.0 TO 2000.0]" },
over_2000: { label: 'over $2000', fq: "price:[2000.0 TO *]" }
}

config.add_index_field 'category', label: 'Category'
config.add_index_field 'brand', label: 'Brand'
config.add_index_field 'condition', label: 'Condition'
config.add_index_field 'format', label: 'Format'
config.add_index_field 'screen_size', label: 'Screen size'
config.add_index_field 'color', label: 'Color'
config.add_index_field 'memory', label: 'Memory'
config.add_index_field 'price', label: 'Price'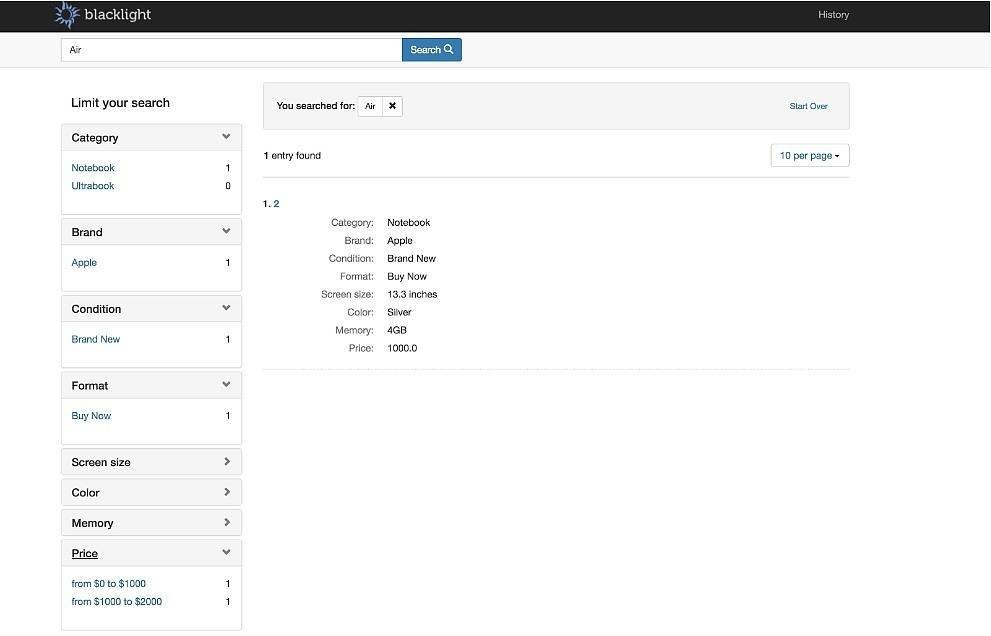
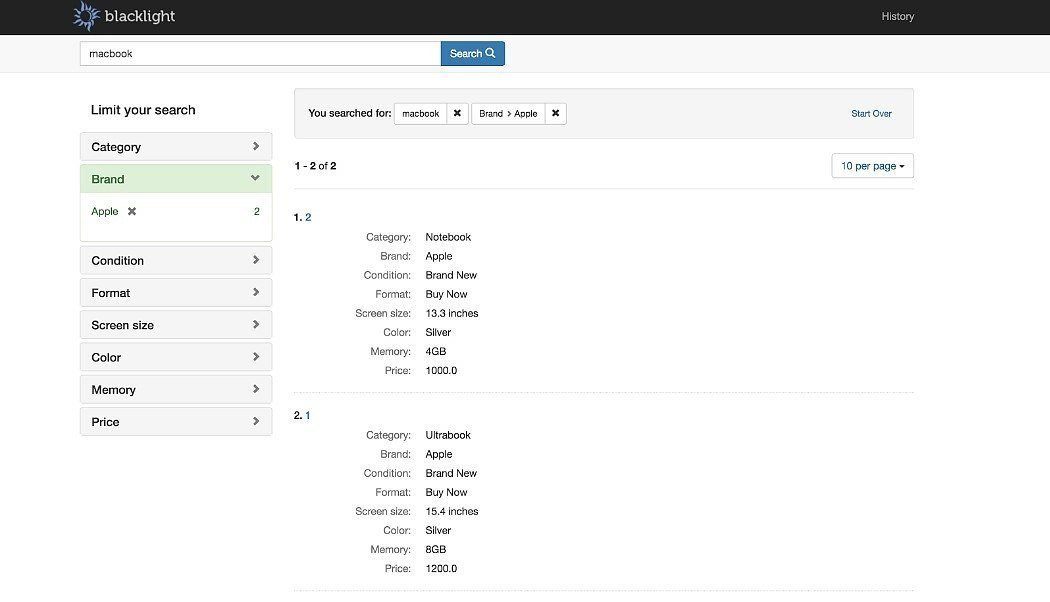
Take a look at the left side of our page. The facets have appeared! See how easy it is? By just adding a few lines of code with specified facets then refreshing, they appeared! Trust us, writing a facet from scratch is not as fast as adding a single line of code!
Now it’s time to play with them to filter search results.
Step 20 – Modify search results
A single search result header will point to the show action from the CatalogController. You want to change it so you have the link to the show action for the ItemsController. To achieve this, you must override the standard Blacklight views – find a correct partial view and change with your file.
The document header is inside the div with ‘DocumentHeader’ class. To find it, we use Github’s search inside the Blacklight repository:
https://github.com/projectblacklight/blacklight/search?utf8=%E2%9C%93&q=documentHeader
You will find it inside the _index_header_default.html.erb file. You need to add this file to your application. It’s under the app/views/catalog.
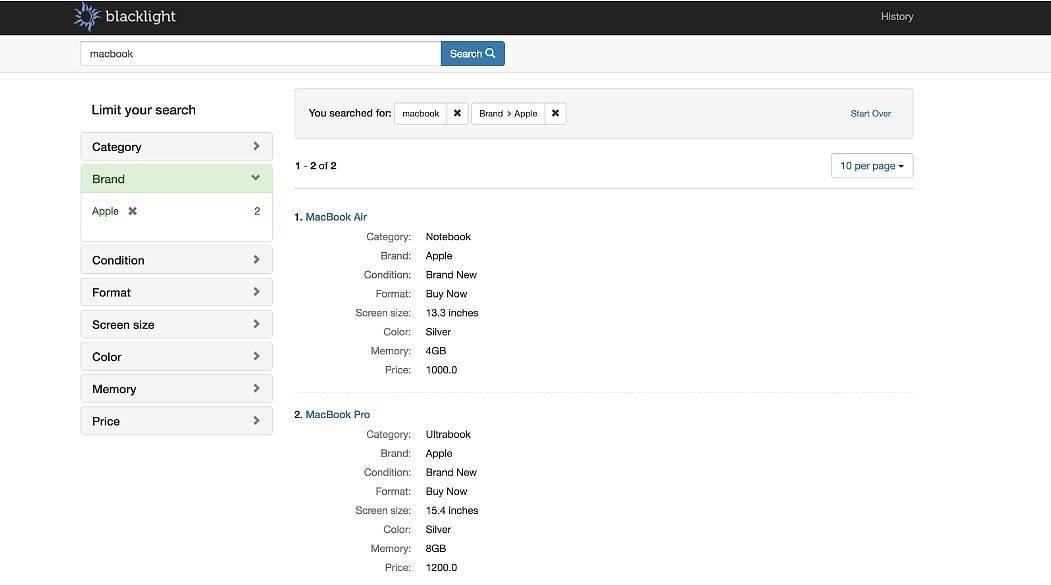
Add _index_header_default.html.erb inside in the catalog folder. All data from SOLR is under the document variable. Data from an item is stored in the document._source. If you know how to get item’s data, you can modify link, which points to an item.
Refresh the browser and check if partial has been updated. If it has, success! Now if you click on a link, you will visit an item’s show page: http://localhost:3000/items/2. Now you are inside ‘normal’ view, you can fully customize it – add images, change content, grid etc.
Step 21 – Add more data – fill a database with sample data
In a few steps you added a high-performing search engine to your application. Now searching 2-5 million records is not a problem! You need to create test data. We like to use Faker gem. Add it to the Gemfile under the development and test group:
gem ‘faker’
Then run:
$ bundle install
We modified seeds.rb insite the data catalog, so we are able to run rake db:seed to populate our database with some data:
An important point to note is that you don’t want to run the SolrService.commit method after every item creation. If you have 1 million documents in your core it will be slow, because it makes a commit to Solr. Instead of this, after every item creation, you can add item’s data to Solr by using the SolrService.add method and at the end, run the SolrService.commit once. This will commit all documents to Solr in one run, so it will be much faster! Let’s modify the Item class:
Now you can run rake db:seed. It will take a while – it creates 200_000 records.
$ rake db:seed
When you are done, you can test and see results.
Let’s search for the phrase ‘Black’…
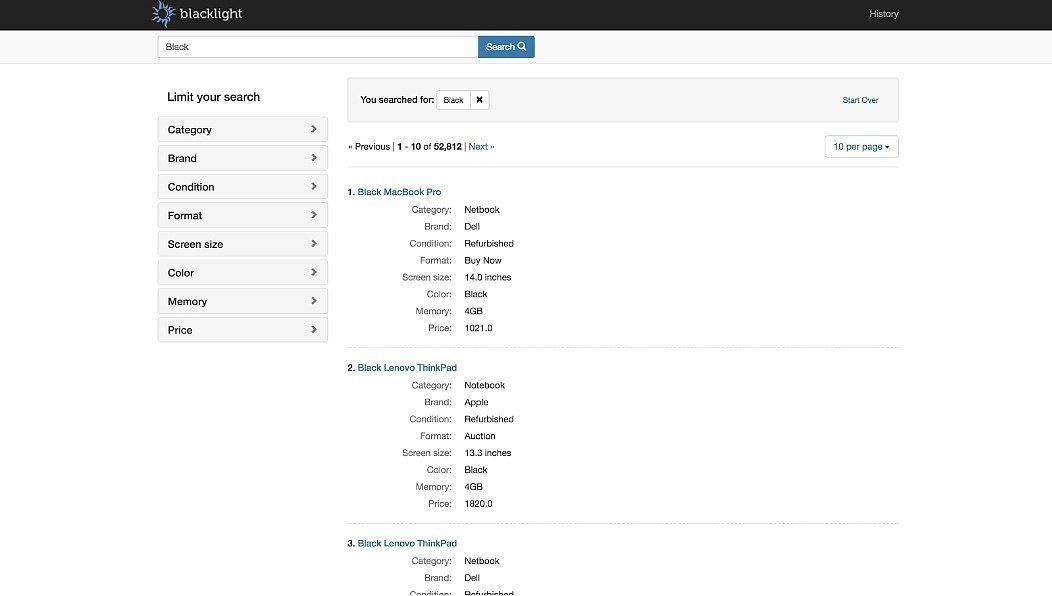
We found 52,812 results. Let’s look how long it took to render and search for everything:
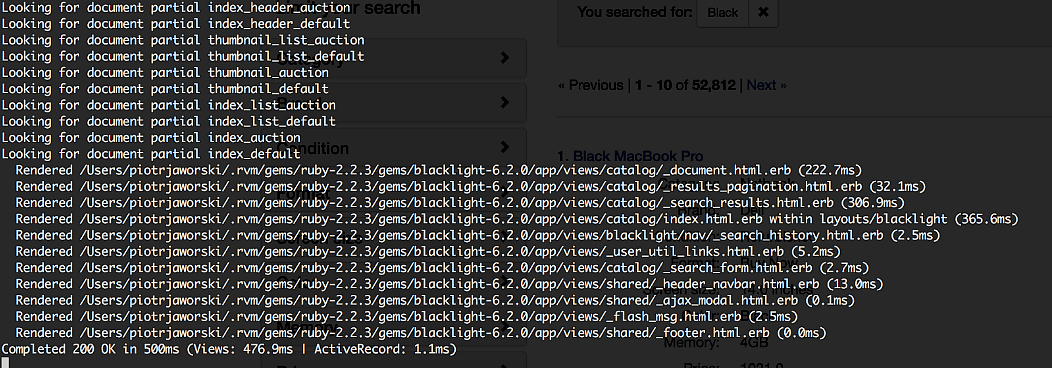
500 ms for all – rendering views, an ActiveRecord query and searching. Pretty good, right?
So without any big effort, we created the full application in which we can search for computers then filter them in a very effective way. That’s SOLR and that’s Blacklight!
If you want to check the application’s full source code, you can get it from the repository in our Github account. We have also attached the folder with files from our Solr core to the repository. You can copy it to your Solr cores’ folder (eg: /usr/local/Cellar/solr55/5.5.0/server/solr/).
Blacklight in a real application
In our last project – Manifest App (the full case study article we wrote can be read here), we integrated Rails and Solr using Blacklight. We wanted to customize faceted search and other Blacklight features and we did it without any problems. Blacklight is really flexible for any customizations, and thanks to its open source, it is easy to do so. So if you consider Blacklight a good solution for your application, what are you waiting for?
I hope that you liked this article and it would be useful for you in the future! If you have any questions, feel free to post a comment or contact directly with us at [email protected].