

As you've probably guessed by the title of my article, I still consider Ruby on Rails as a relevant technology that offers a lot of value, especially when combined with ReactJS as it's frontend counterpart. Here's how I approach the topic.
Have you ever dreamed about deploying your application to a server so you could show your friends or test how it would work in a production environment? Yeah, I remember when I wrote my first, simple web-application in Ruby on Rails and I wanted to deploy it somewhere. I was trying to find a good provider but a lot of hosting companies were only offering PHP support. So, basically, you were only able to deploy a WordPress or PHP application. Then I found one provider who claimed that with their servers, you could deploy your Ruby application with just one command, just like git push origin master and voila, everything is ready!
It’s called Heroku, and it supports a lot of different languages, Ruby, Python, Go, Java, Scala, Node.js, Clojure and PHP. Basically, you can deploy an application for free though you’ll need to pay for a better dyno (server) you need to upgrade.
Honestly, Heroku is not the cheapest option on the market, but it’s really intuitive and easy to use. You don’t need to care about a whole OS setup on your server, you don’t need to restart your server while it goes down or write magic scripts to deploy your application. You can just type one command and boooom, your application is deployed and ready to use!
What is cool about Heroku? It supports a lot of different plugins and tools. You can easily connect New Relic, Redis or a database. I’m pretty sure that you’ll find something for anything you are looking for 🙂
In this tutorial, I’ll cover how to create, setup and deploy a new application to Heroku. I’ll show how to configure Redis, Sidekiq, Cron, Action Cable and a database – so everything that you really need!
Create an account and an application
Ok, now that you know what is Heroku, let’s start with creating an account. You should visit their sign up page and get set up.
After you create it, visit this page and create a new application, then select your region and an app-name:
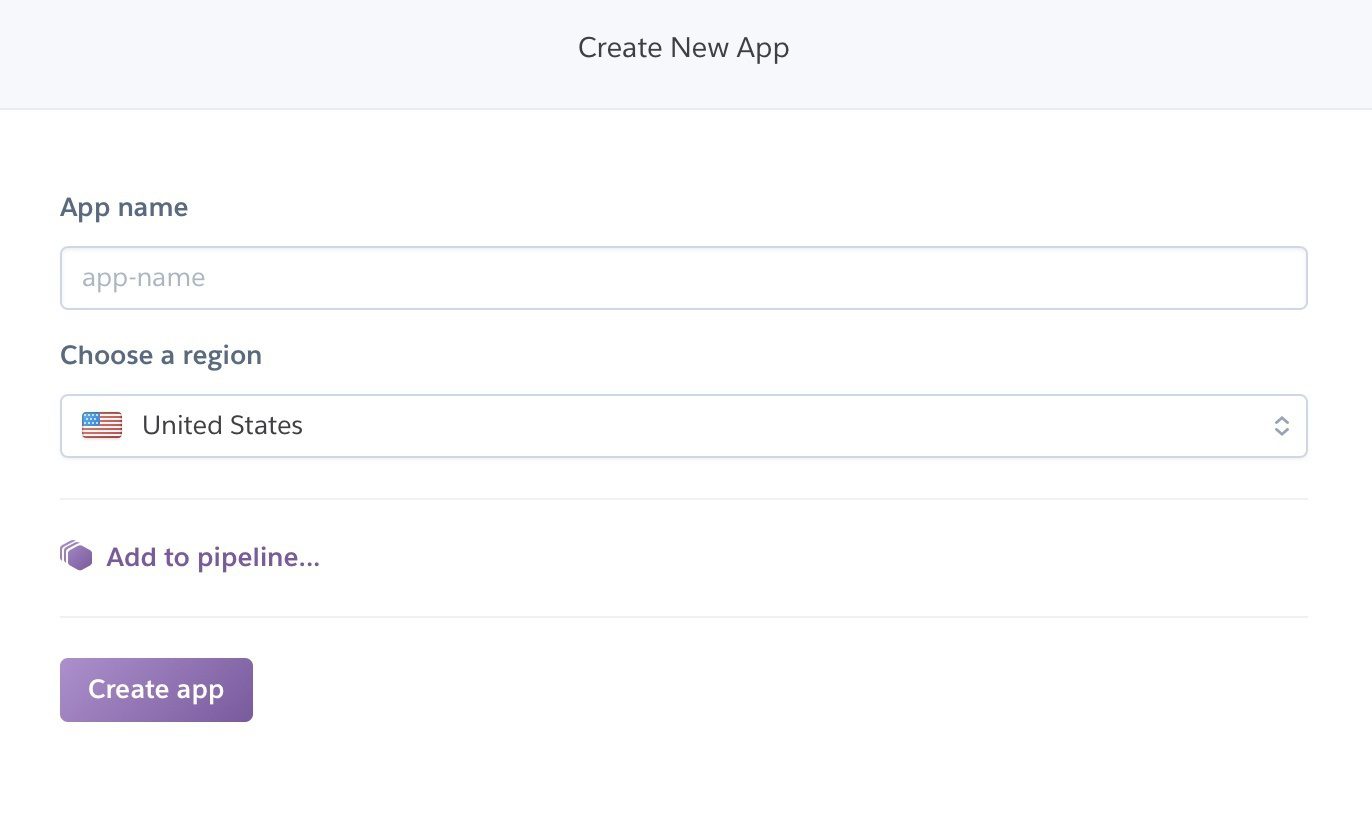
Cool, you’ve just created a new application on Heroku. It sounds existing, doesn’t it?!
Login to Heroku via terminal
Now, you need to select which application you want to deploy there. If you don’t have any, it’s totally ok. You can clone mine, which I created especially for this tutorial:
$ git clone https://github.com/nopio/deploy_app_to_heroku
After you select or clone an application, enter the application’s folder using terminal:
$ cd your_application_path/your_application_name
Cool, now need to login in order to deploy anything to Heroku, you can do it using this command:
$ heroku login
If you don’t have the Heroku gem installed, you can get it from RubyGem:
$ gem install heroku
Now try to log in again. You should enter your email and password, or event two-factor auth code if you enabled two-factor authentication. After you successfully log in, you should see something like:
Logged in as [email protected]
Deploy options
Awesome, now please go to the “deploy” tab in the dashboard:
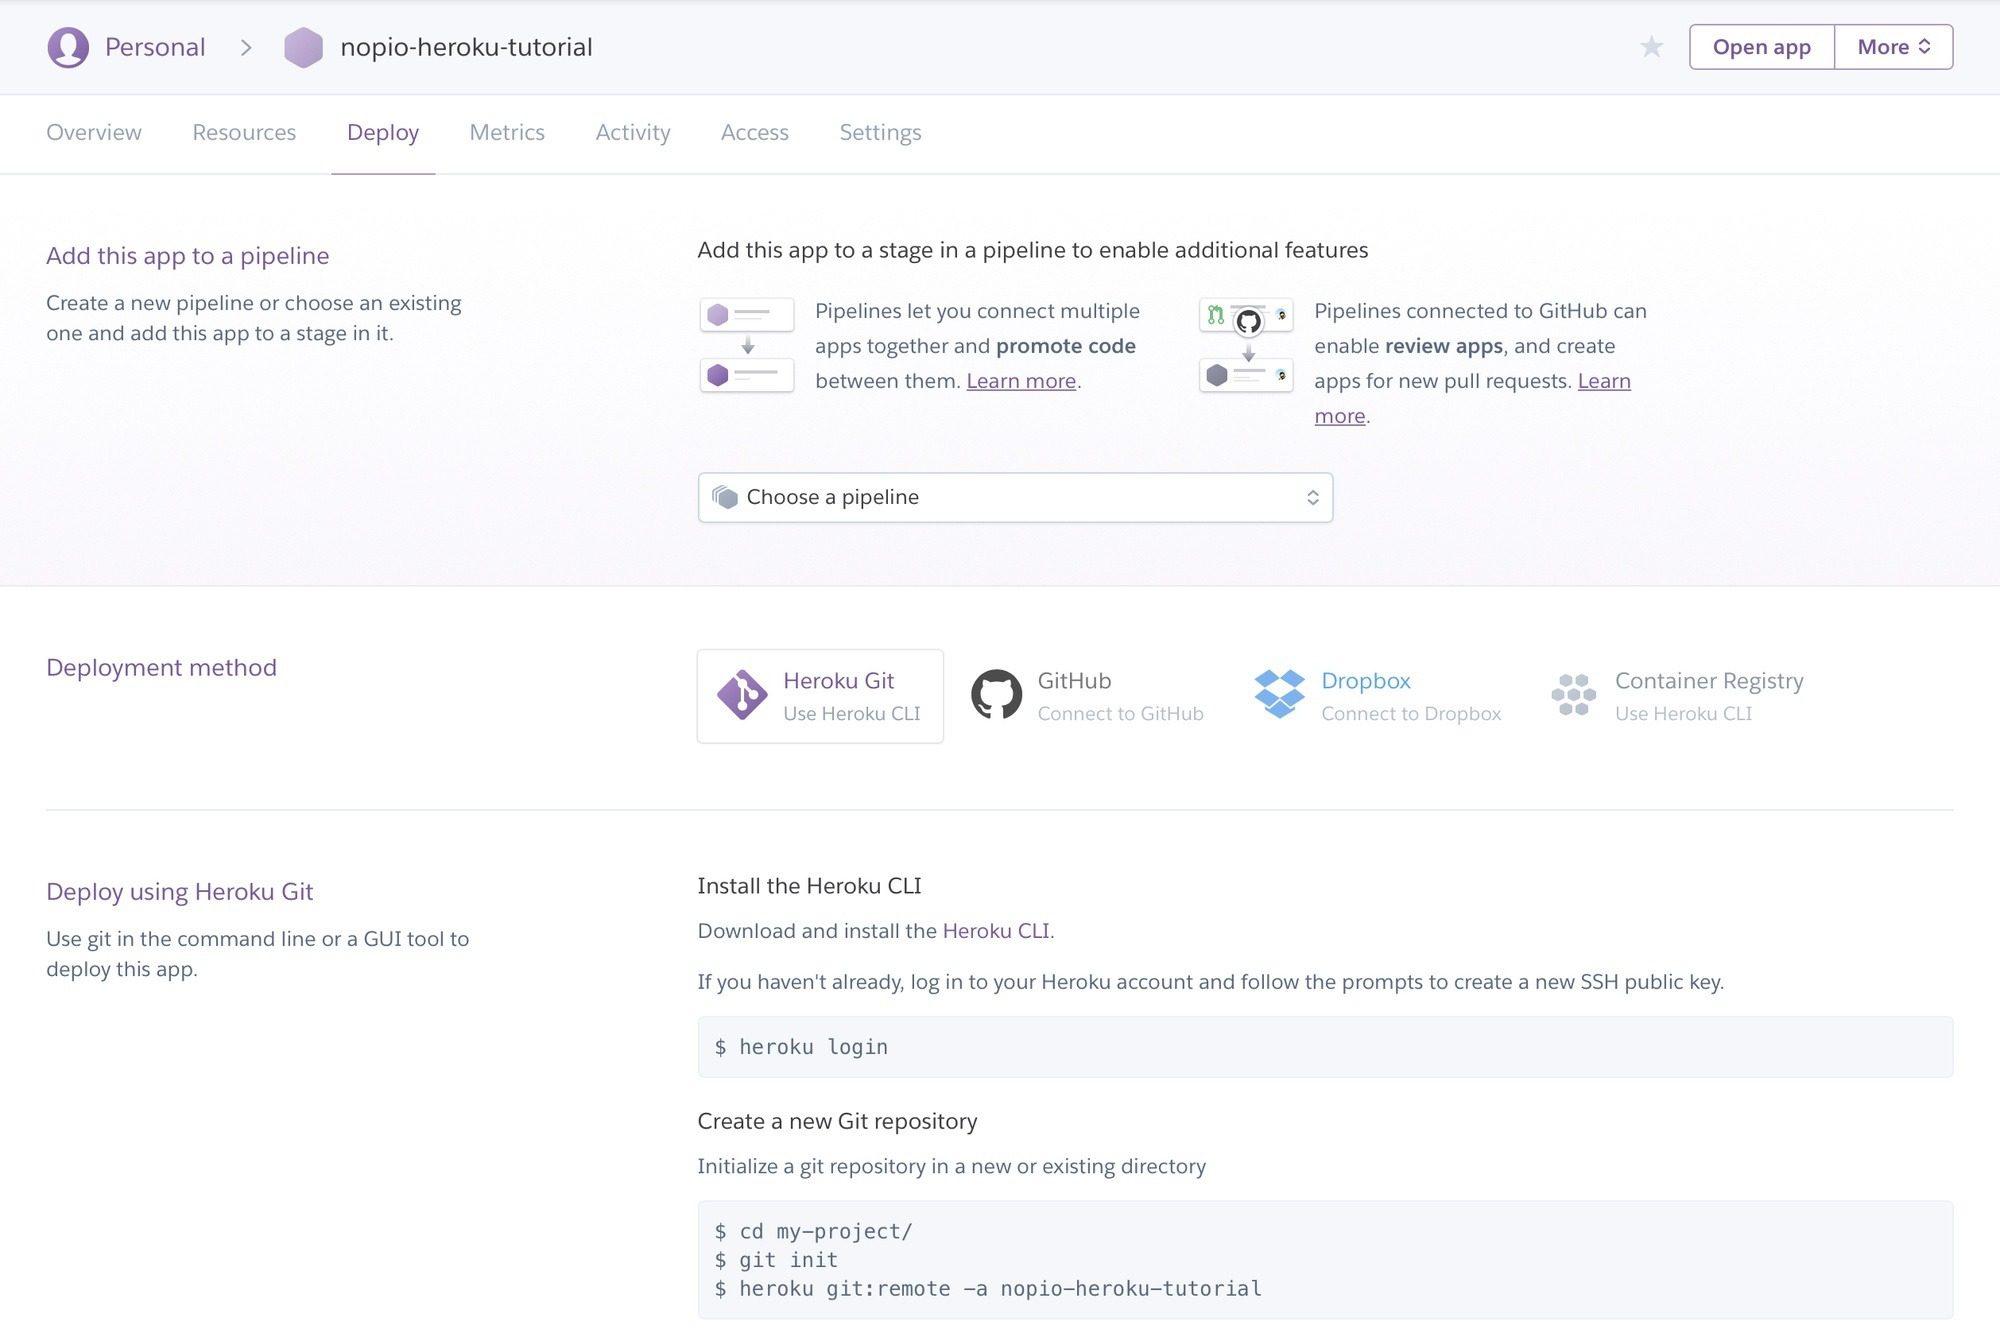
Now, there are two options to deploy an application. You can do it directly by using a command line interface (terminal) or by connecting your application to a Github, Dropbox or Heroku CLI.
I’ll cover a how to deploy from the command line and connecting your application to Github.
Deploy via terminal
Let’s start from the command line. In order to enable a deploy, you need to set a Heroku remote:
$ heroku git:remote -a YOUR_APPLICATION_NAME
When you’re done with it, just run:
$ git push heroku master
After you enter the following command, you should see something like:
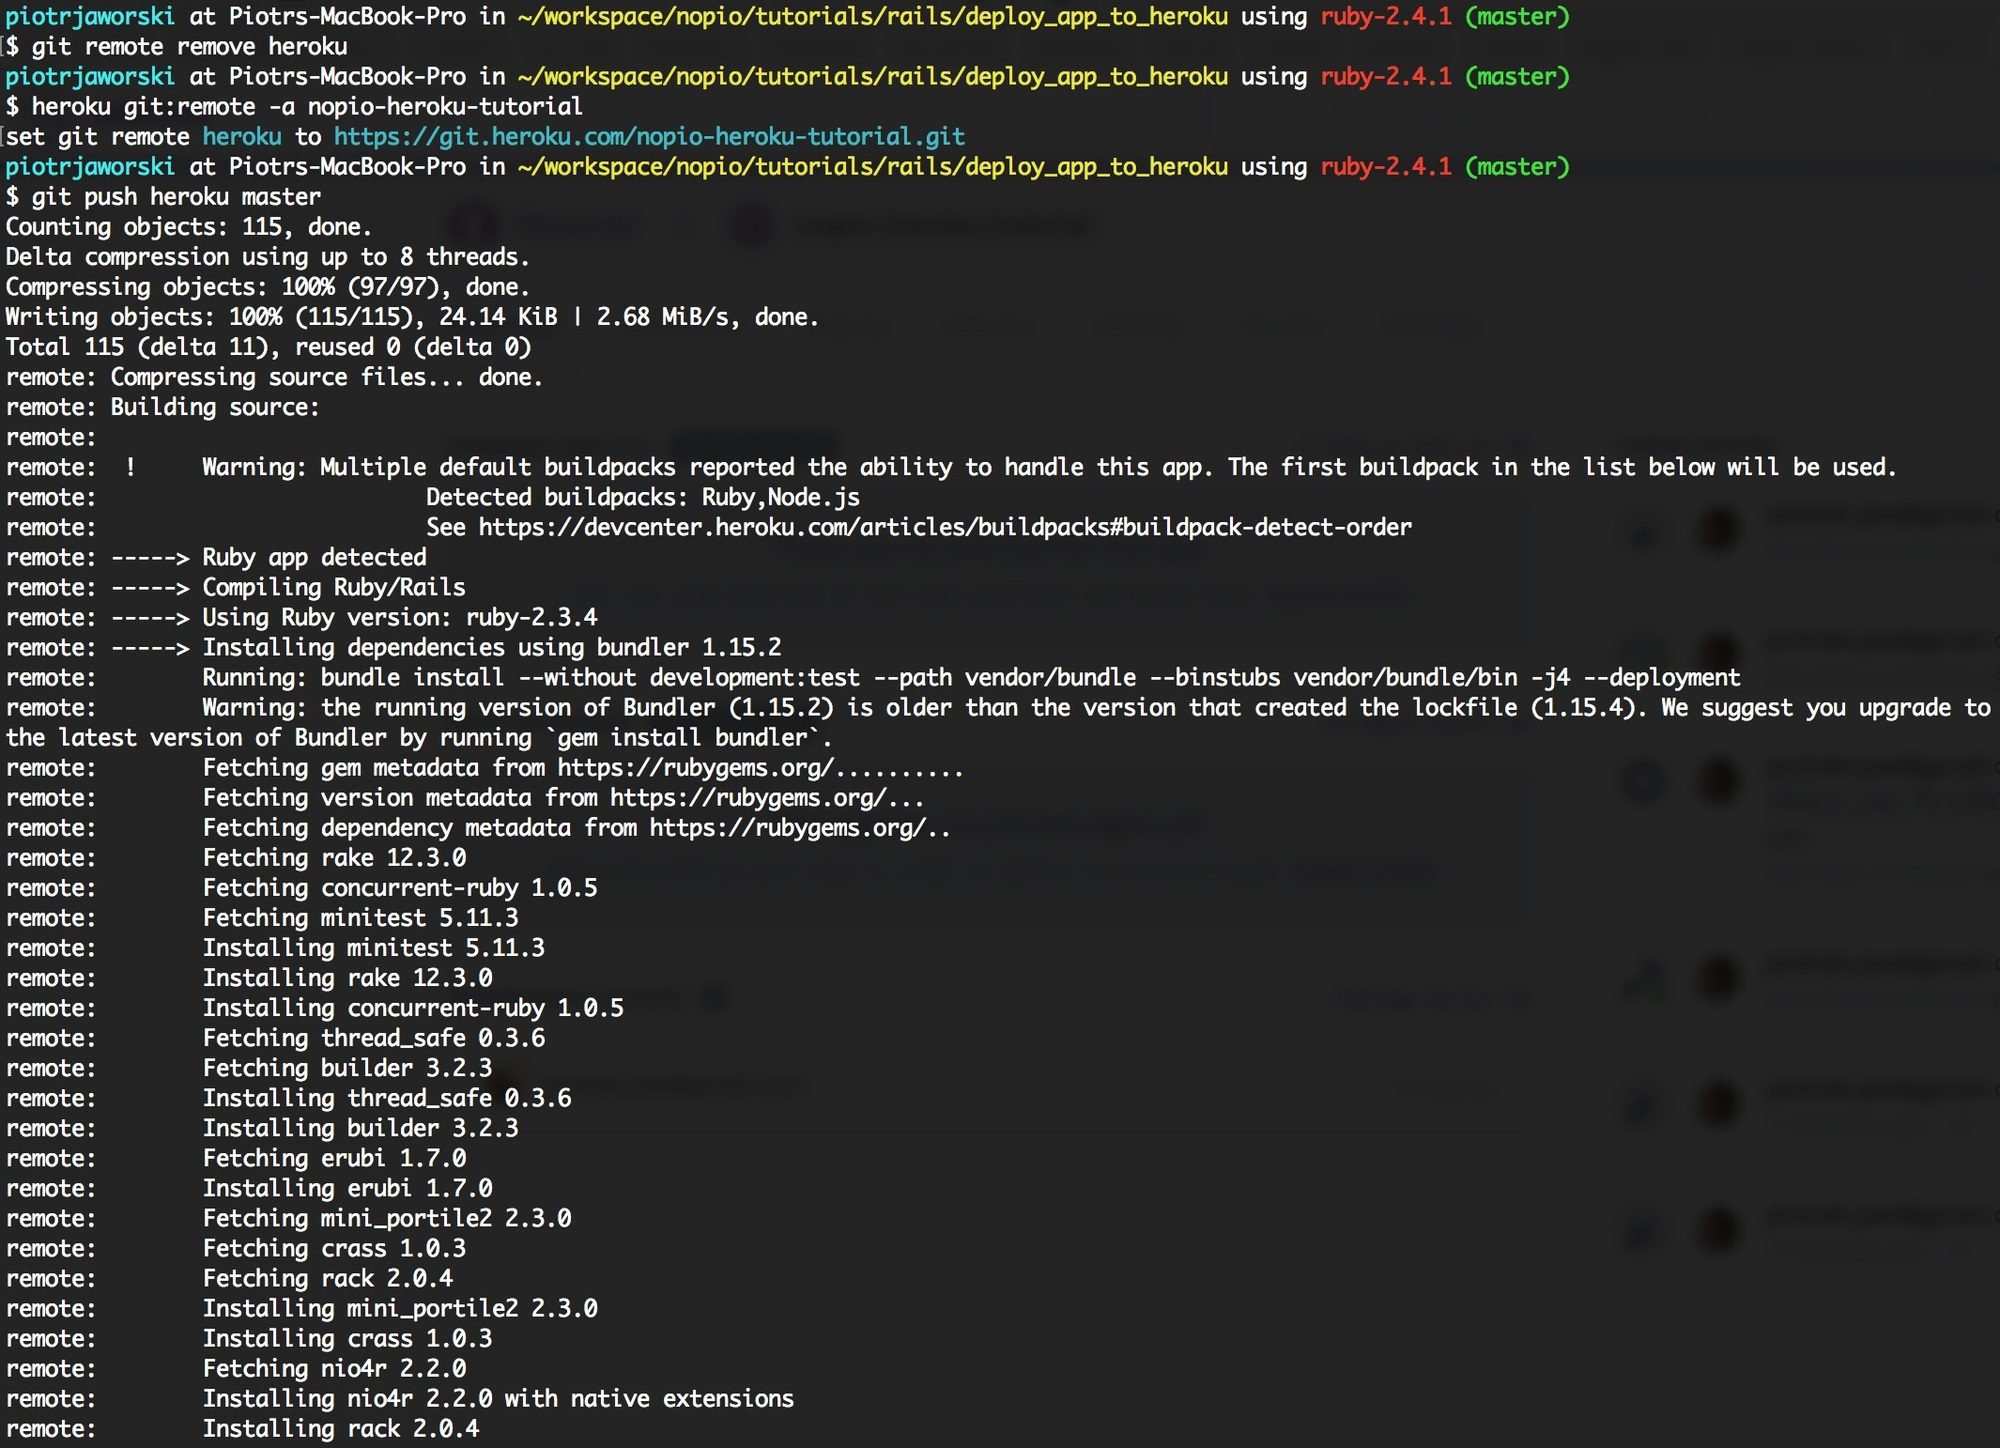
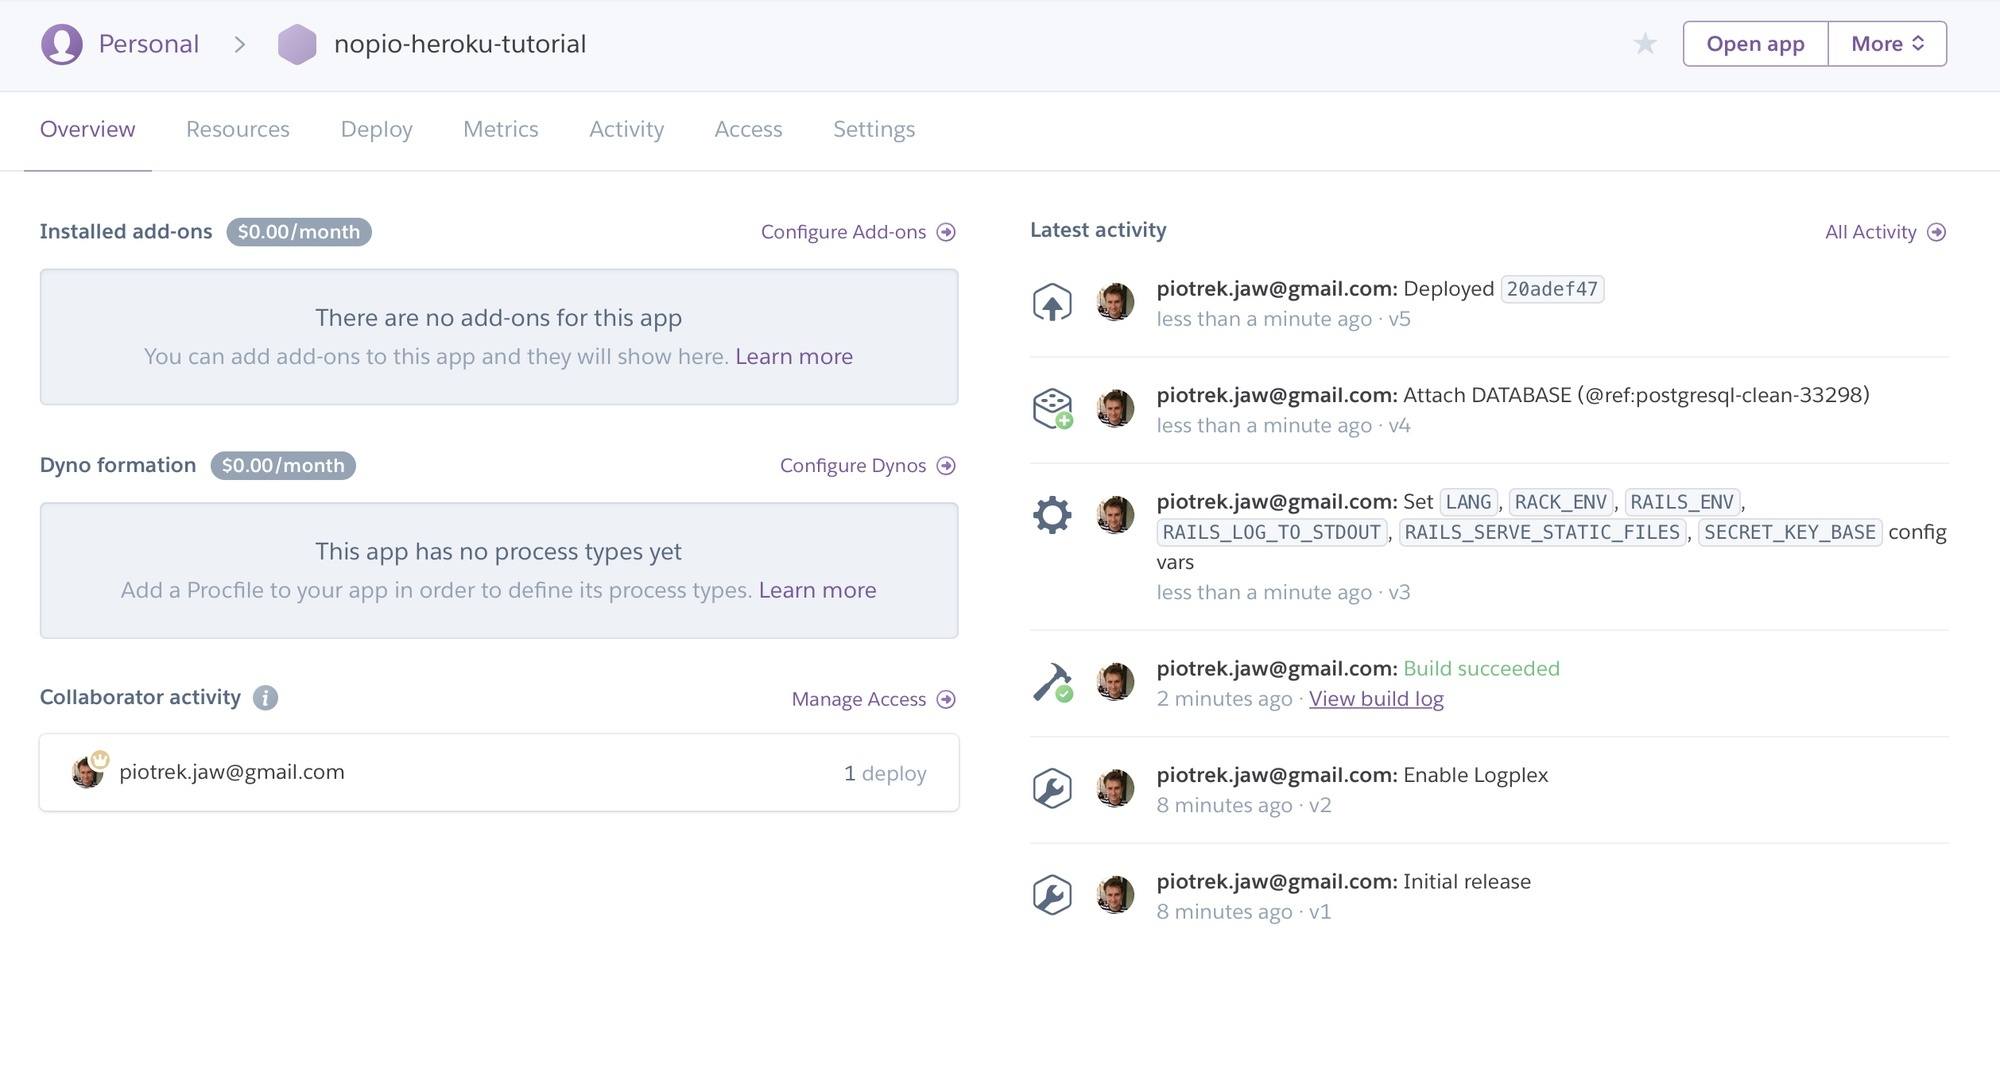
This means that you’ve just initiated a deploy. You can check it also in the Heroku dashboard:
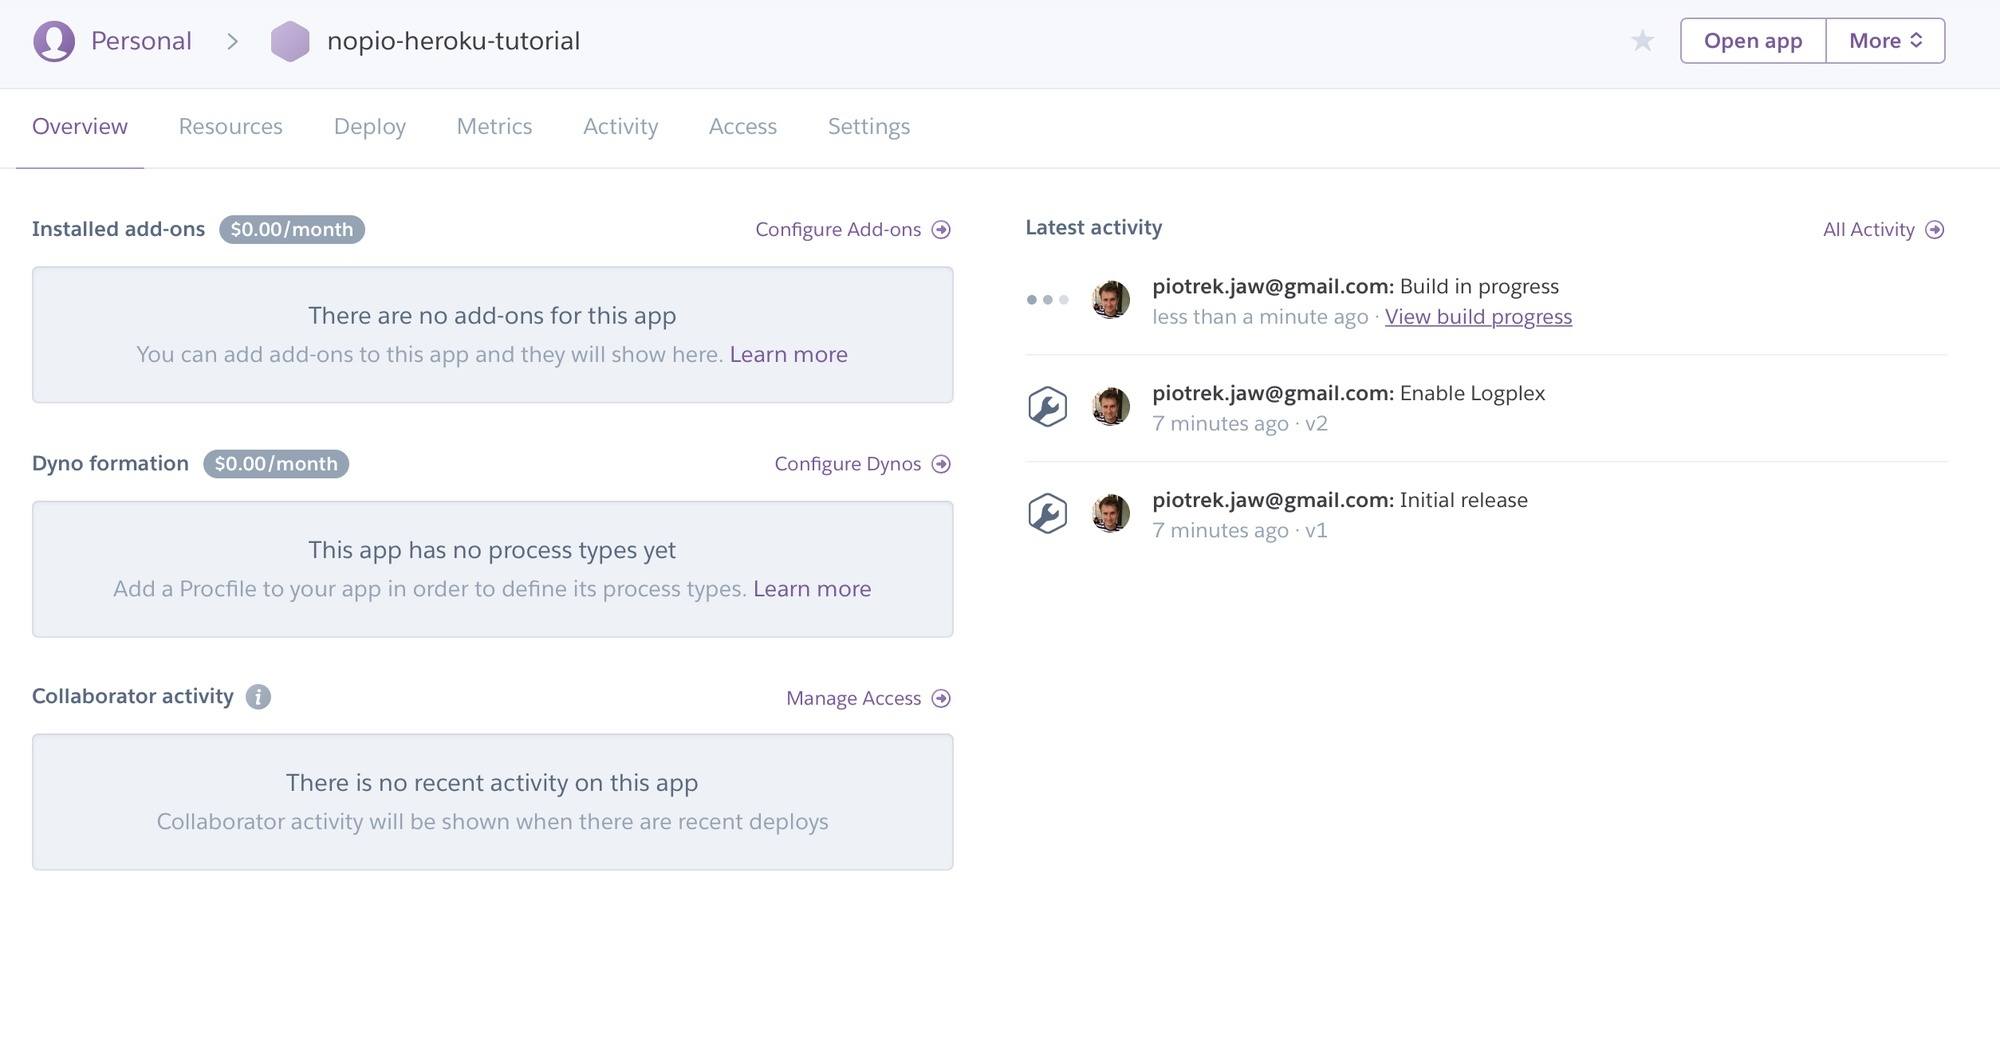
After your deploy is successful, you should be able to see a green icon and notifications that Heroku set some environment variables. It auto generates the following variables:
– RACK_ENV,
– RAILS_ENV,
– DATABASE_URL,
– LANG,
– RAILS_LOG_TO_STDOUT,
– RAILS_SERVE_STATIC_FILES
– SECRET_KEY_BASE
You can check all variables here, in the “Setting” tab:
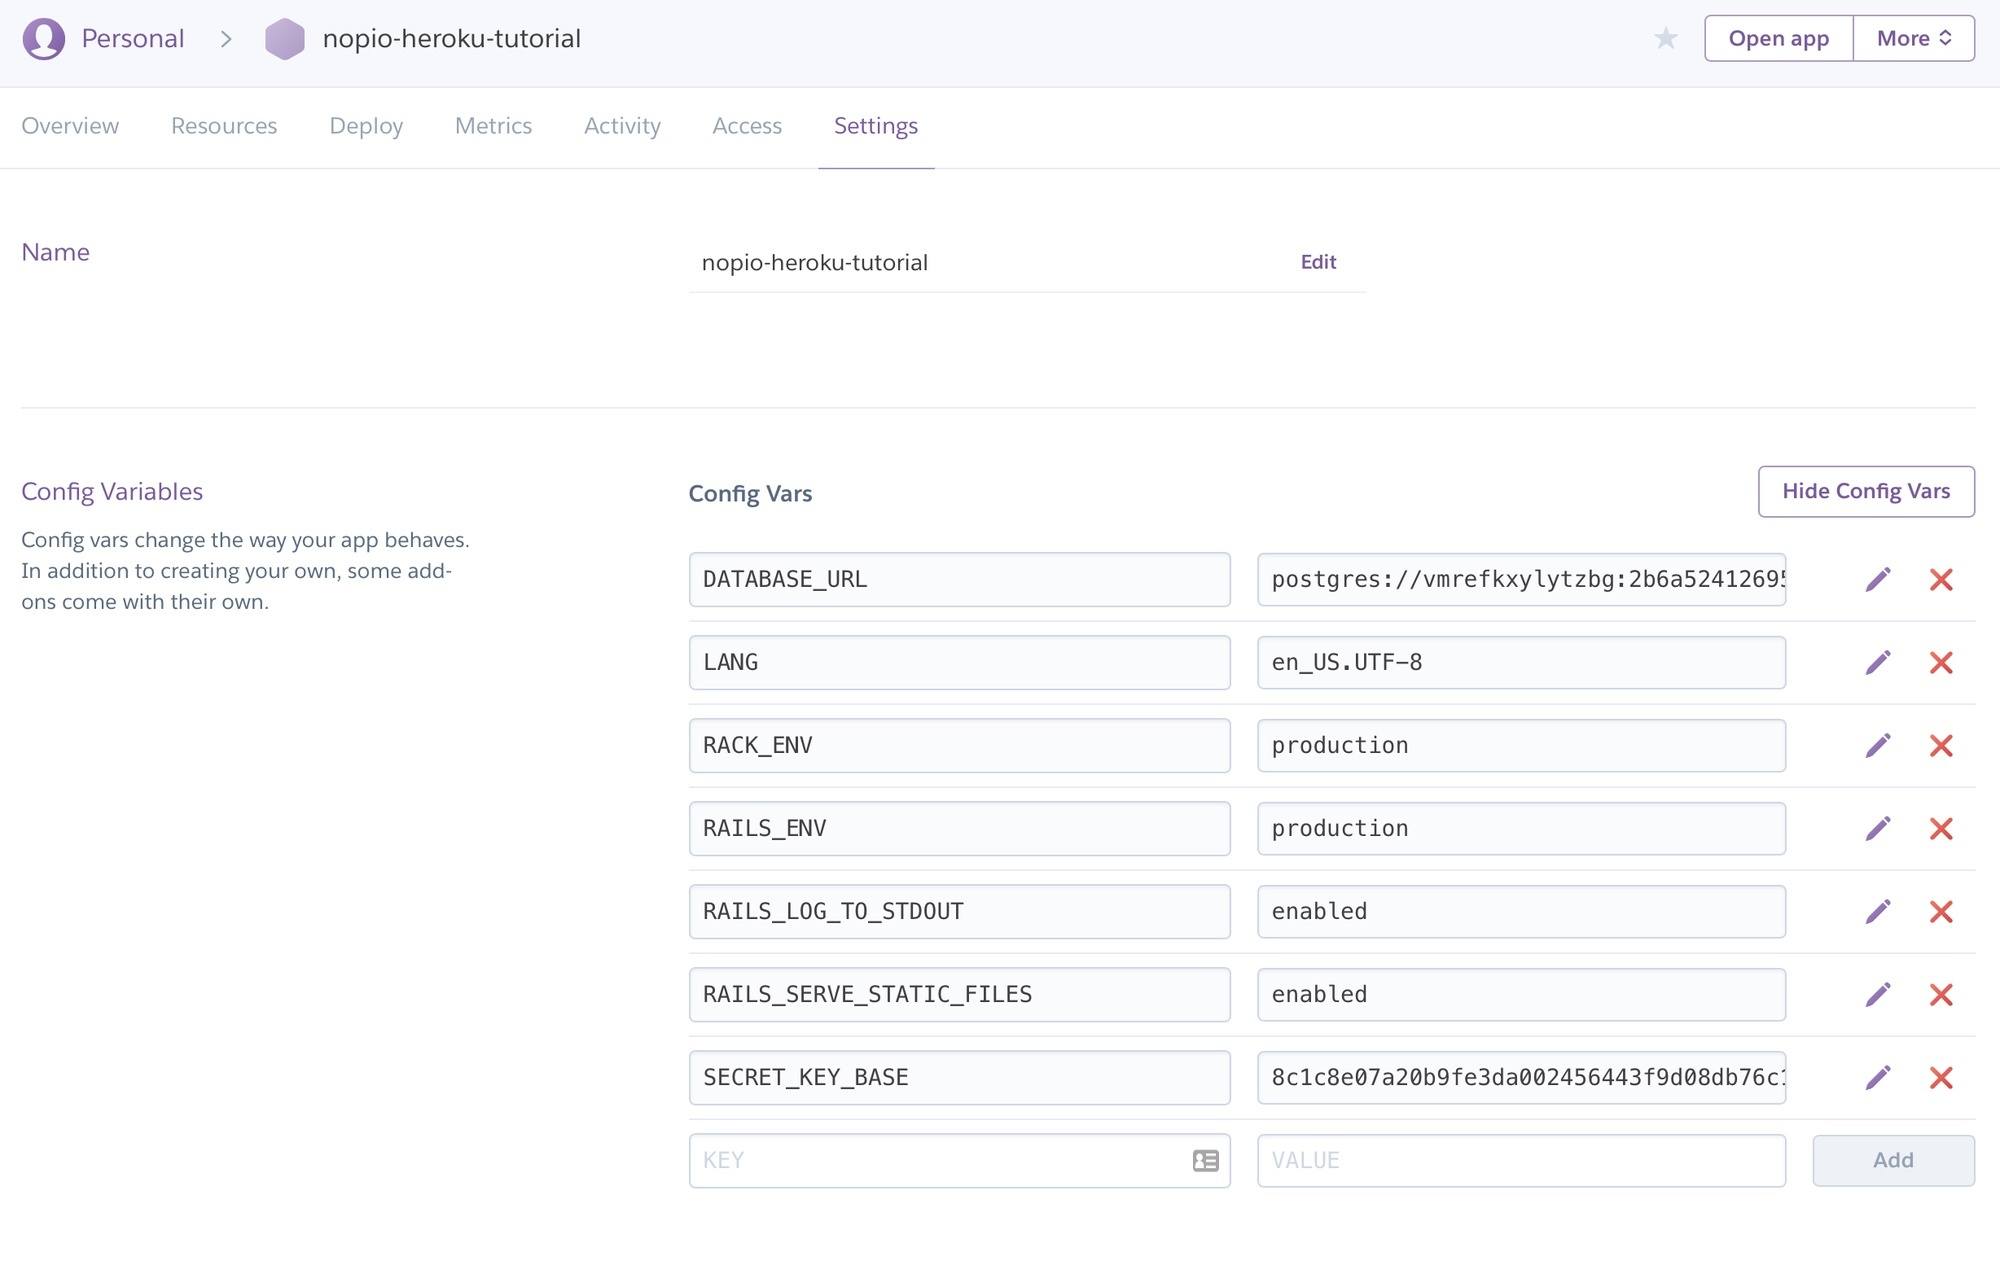
Yeah, Heroku did almost everything for you, it even created a new database for you!
If you want to use a different database, you can change the DATABASE_URL variable, to a new endpoint.
Deploy with GitHub
Another option to deploy your app as I mentioned before is to connect Heroku with Github. Go to the “Deploy” tab and click on the Github icon and then on the Connect to Github button:
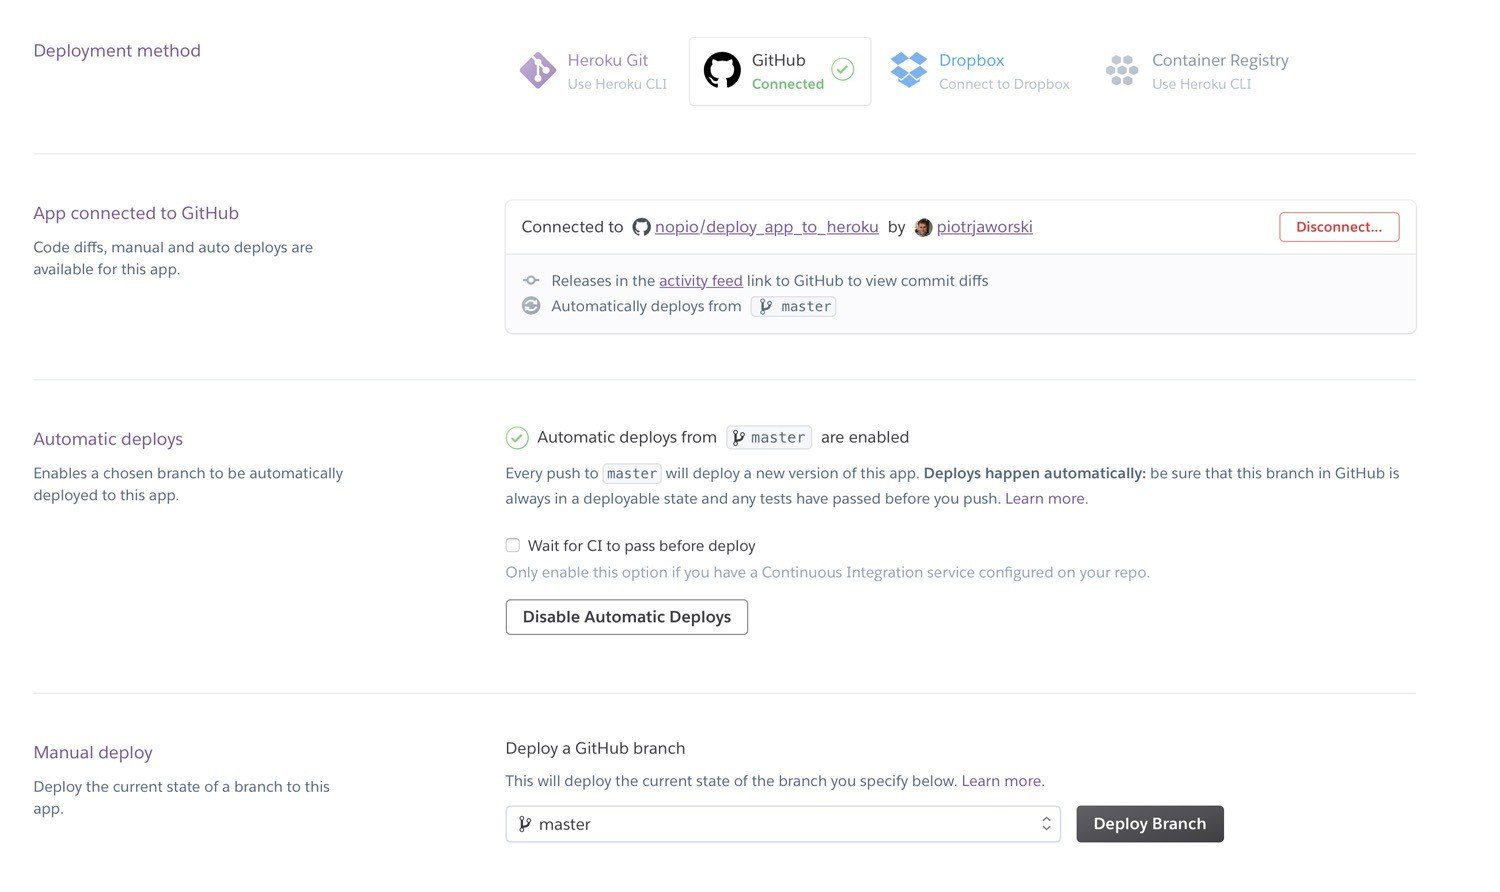
Then select your Github repository, either from your personal or company profile. After you select a repository, you’ll be able to select Automatic Deploys after you deploy the main branch (master probably) to Github. This means, that when you deploy a new commit to Github, it’ll be automatically deployed to Heroku.
So since now, git push origin master will trigger an auto-deploy.
You can also select wait for a successful CI build. After everything, you should be able to see something like:
If you don’t want to enable “auto deploy” function, you can deploy your newest changes from the selected branch by clicking on the Deploy Branch button. It’s really easy, isn’t it?
Heroku Procfile
Very important part of Heroku deploy process is Procfile, a file which defines your web dynos (Rails application) and worker dynos (Sidekiq). There you can define which server client Heroku should use and how your worker should be configured.
In this tutorial I’m using this configuration:
web: bundle exec rails server -p $PORT -e $RACK_ENV
worker: bundle exec sidekiq -e $RACK_ENV -C config/sidekiq.yml
worker: bundle exec sidekiq -e $RACK_ENV -C config/sidekiq.yml
- A web dyno – basic Rails server, in this case Puma.
- A worker dyno – Sidekiq client with loaded configuration from config/sidekiq.yml file. On production, with a loaded production environment section:
---
:verbose: false
:concurrency: 5
:queues:
- [main, 5]
production:
:queues:
- [main, 5]
Migrations on Heroku
Another important thing to cover is migrations. Heroku doesn’t run them by default after a deploy or during a deploy. You should handle it manually, by running:
$ heroku run rake db:migrate
Or there is even better options. You can add the following line to your Procfile:
release: bundle exec rails db:migrate
After a new release, the specified command will be run, in this case migrations. From now on, you don’t need to worry about them, they will be run automatically!
In order to add extensions, you’ll need to add your credit card info.
Redis configuration
There is one important thing, in order to add an addon on Heroku, you must provide your credit card information. Don’t worry, you can use only free addons so you won’t be charged!
In order to add Sidekiq, first you need to add a Redis server. You can do it by finding it in Heroku addons. I selected a basic RedisToGo client. Select it and your application, then click on the Provision button and it will be automatically added:
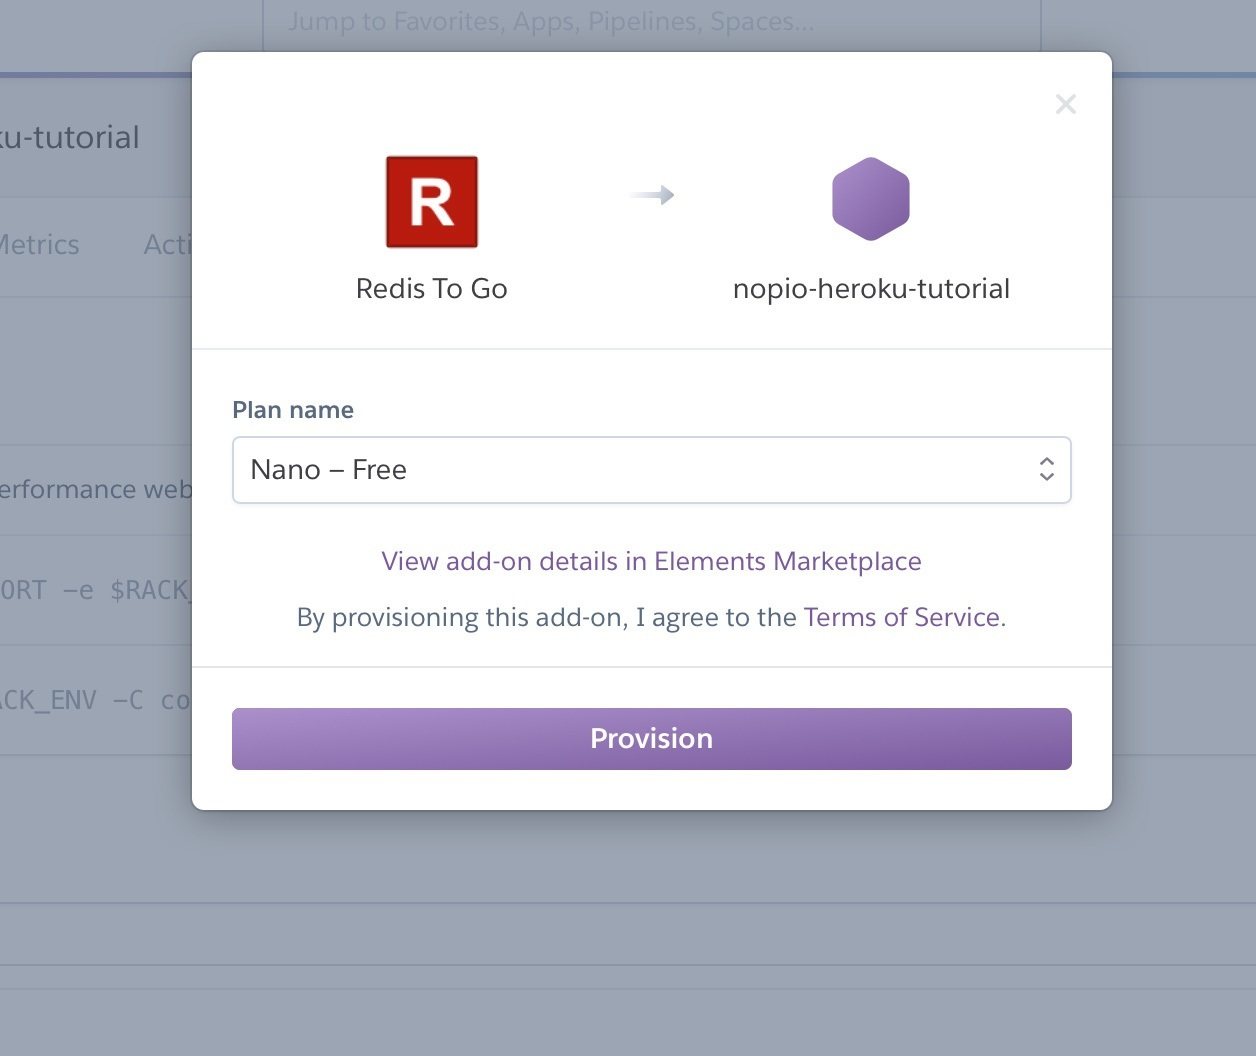
Heroku will add for you a new environment variable, called REDISTOGO_URL:

Now you need to point, that your default Redis provider is RedisToGo. In order to do it, add a new environment variable called REDIS_PROVIDER and set it to the value of REDISTOGO_URL:

Awesome, you’ve just successfully configured Redis on Heroku! Congratz!
Sidekiq configuration
The Redis server is ready to use, now we need to configure Sidekiq. In order to do so, first enable a worker dyno and click on the Confirm button:
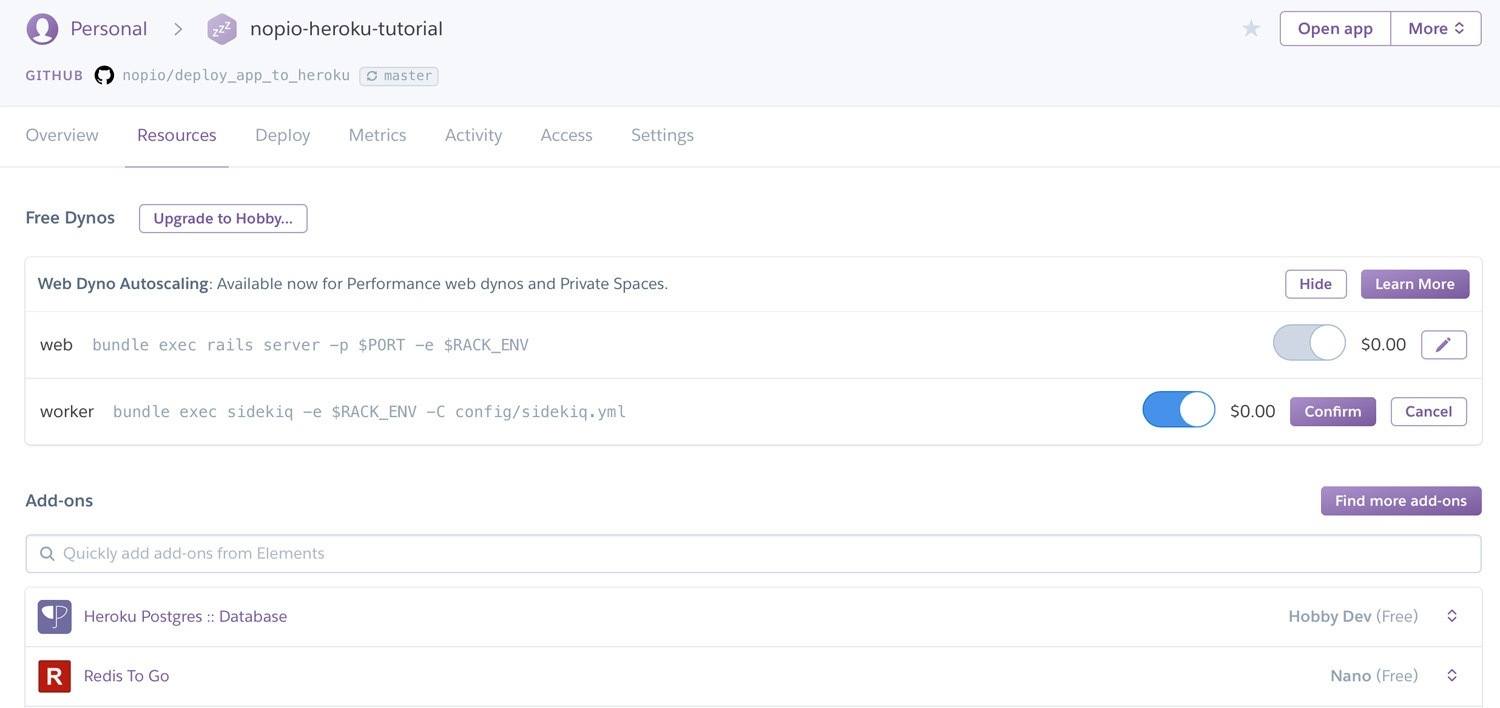
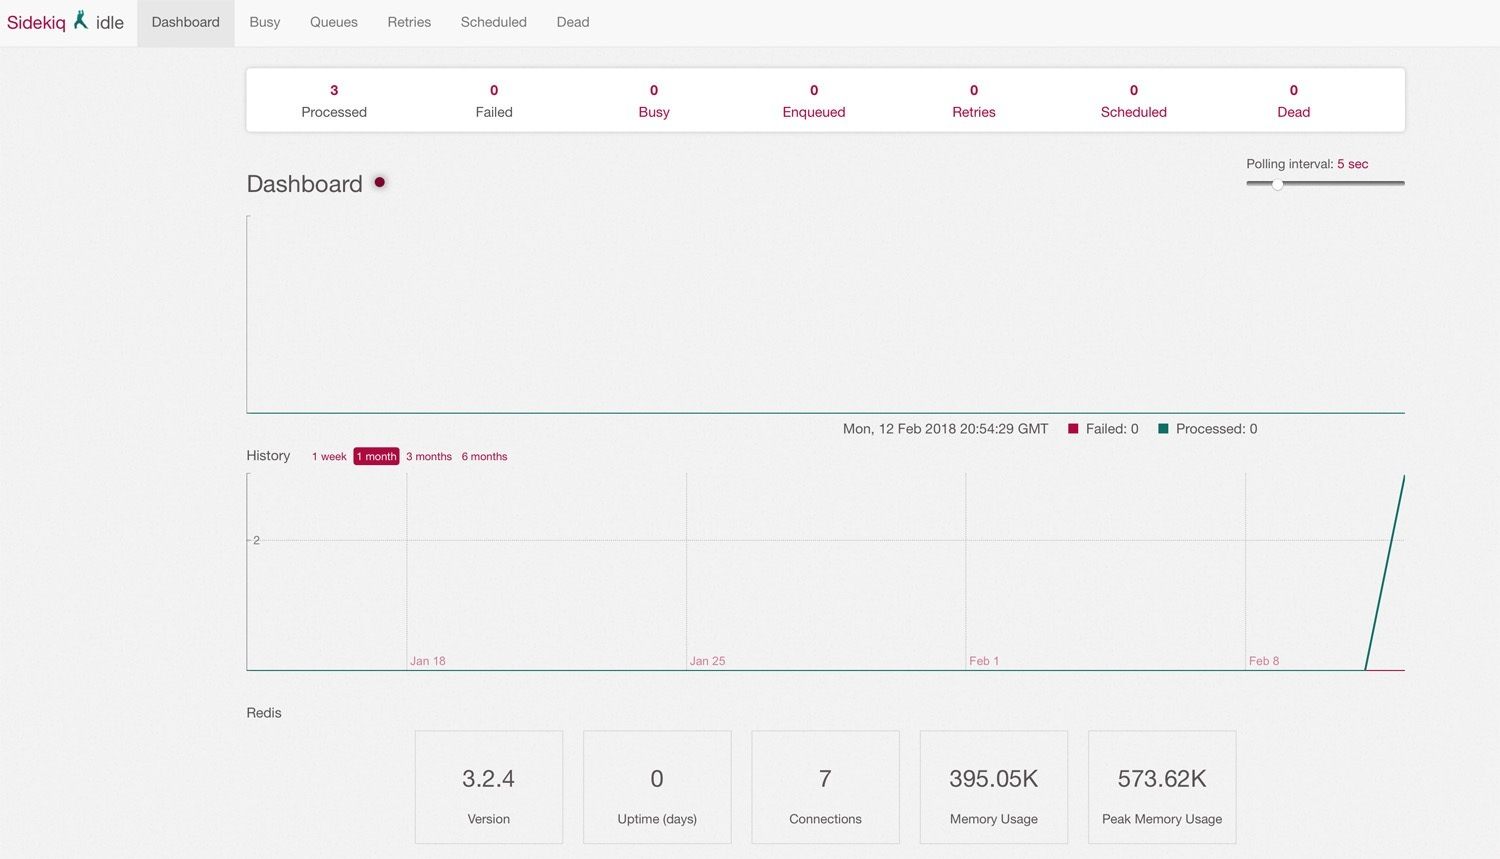
From now on, your Sidekiq client should be available at /admin/sidekiq (if you added Sidekiq routes to your routes.rb file), in my case, it’s located here.
Cron configuration
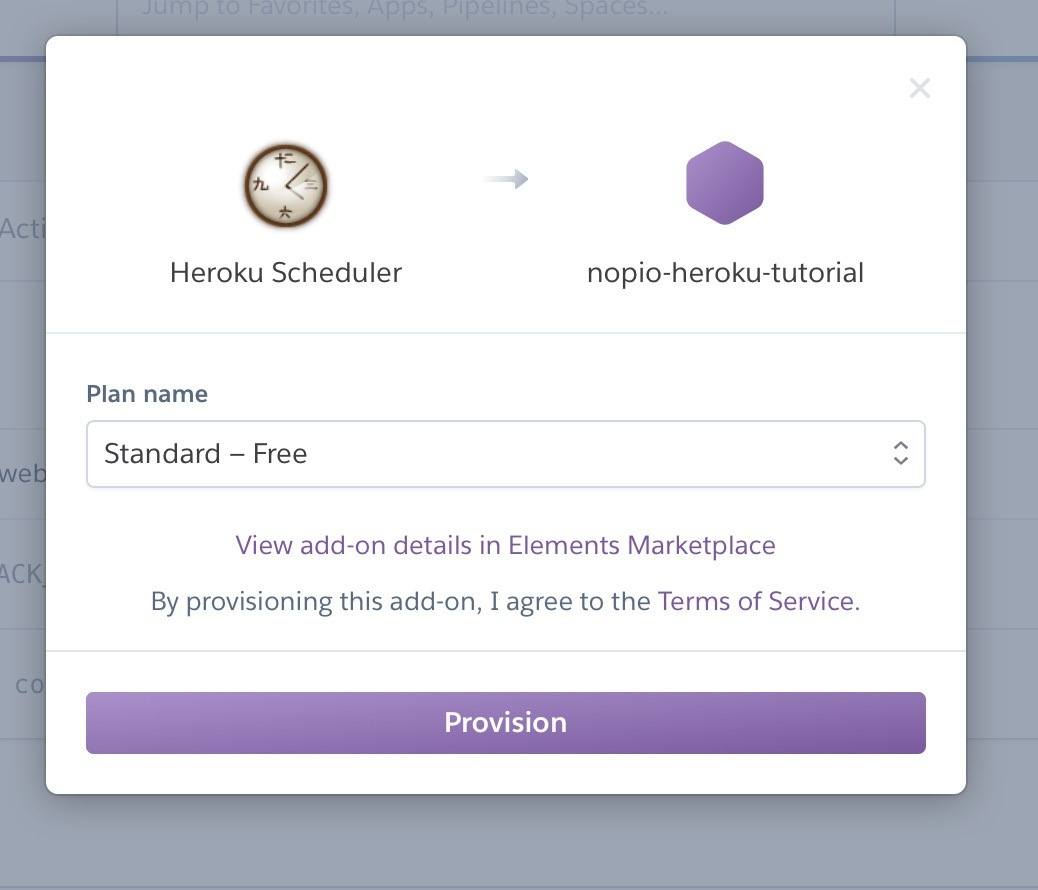
If you want to run any background job as a cron job, you need to add another Heroku add-on, called Heroku Scheduler. It’s available for free, so please add it:
Now if you want to add any new job, just click on the Heroku Scheduler’s icon under the “Overview” tab, it will redirect you here. You can add a job which will run every 10 minutes, 1 hour or daily. Just click on the Add new job button:
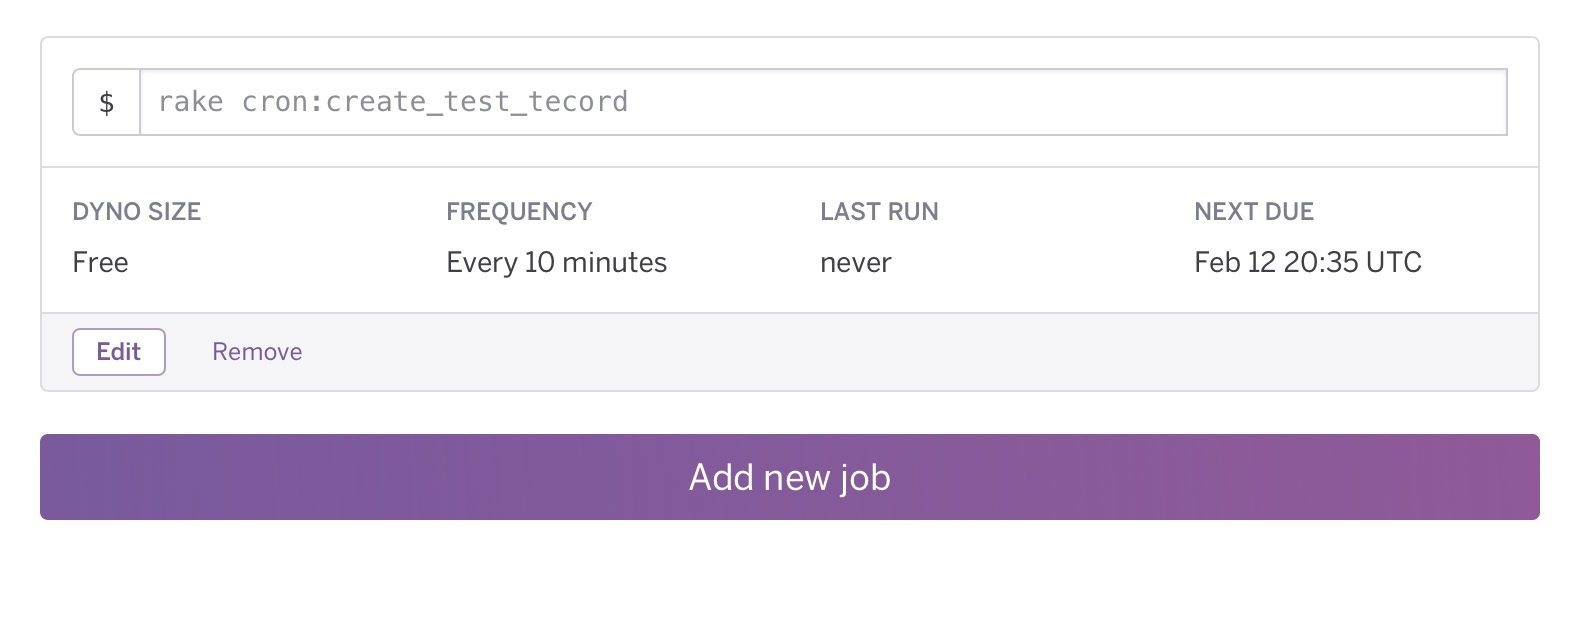
Awesome, cron is ready to rock!
Action Cable setup
Basically, if you want to use Action Cable on Heroku, you just need to use proper settings in the config/cable.yml file. For production I’m using the following settings:
production:
  adapter: redis
  url: <%= ENV['REDIS_PROVIDER'] %>
  channel_prefix: deploy_app_to_heroku_production
I just point to the valid Redis URL and specify a channel prefix, that’s all!
Database configuration
As I said before, Heroku by default adds a basic PostgreSQL database. You can upgrade it to a paid one (for free you can only insert 10,000 records) and change the DATABASE_URL environment variable or alternatively use a database from AWS.
Ready setup
Yeah, we did it! The whole stack is ready to use. You can check out all of the added extensions on the main page:
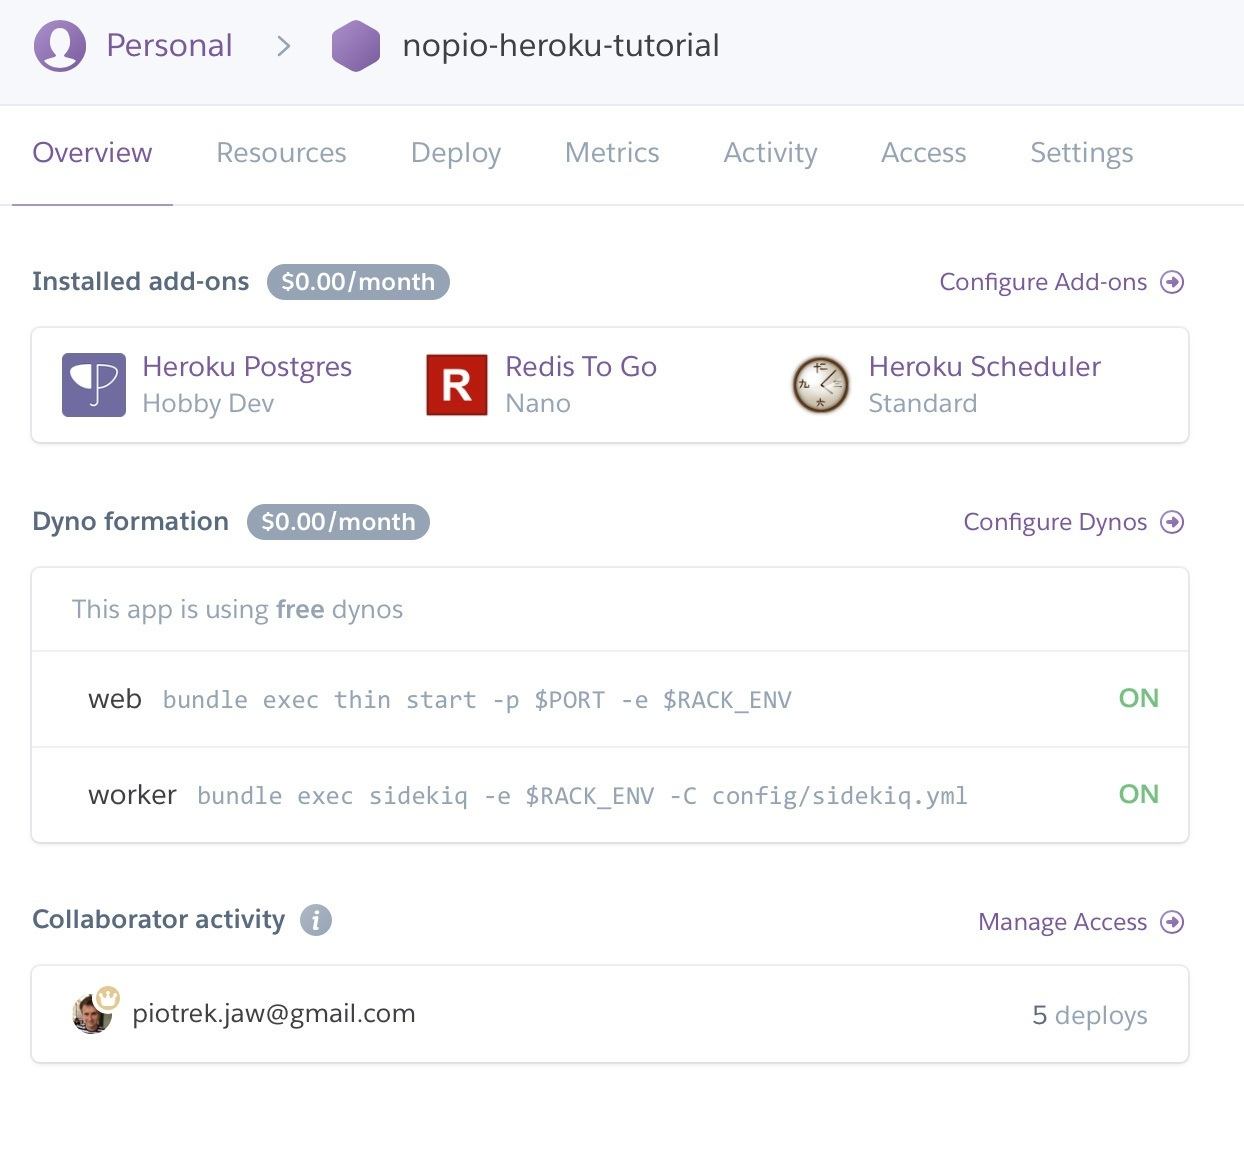
Now we can test it by going to the production page. You should be able to see a basic page:
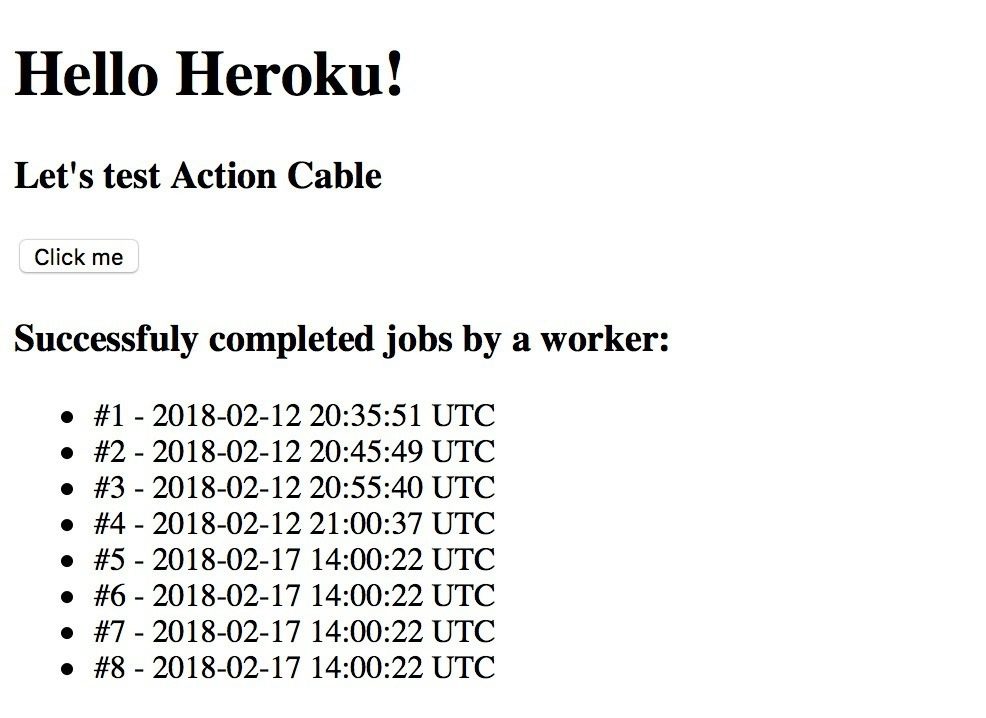
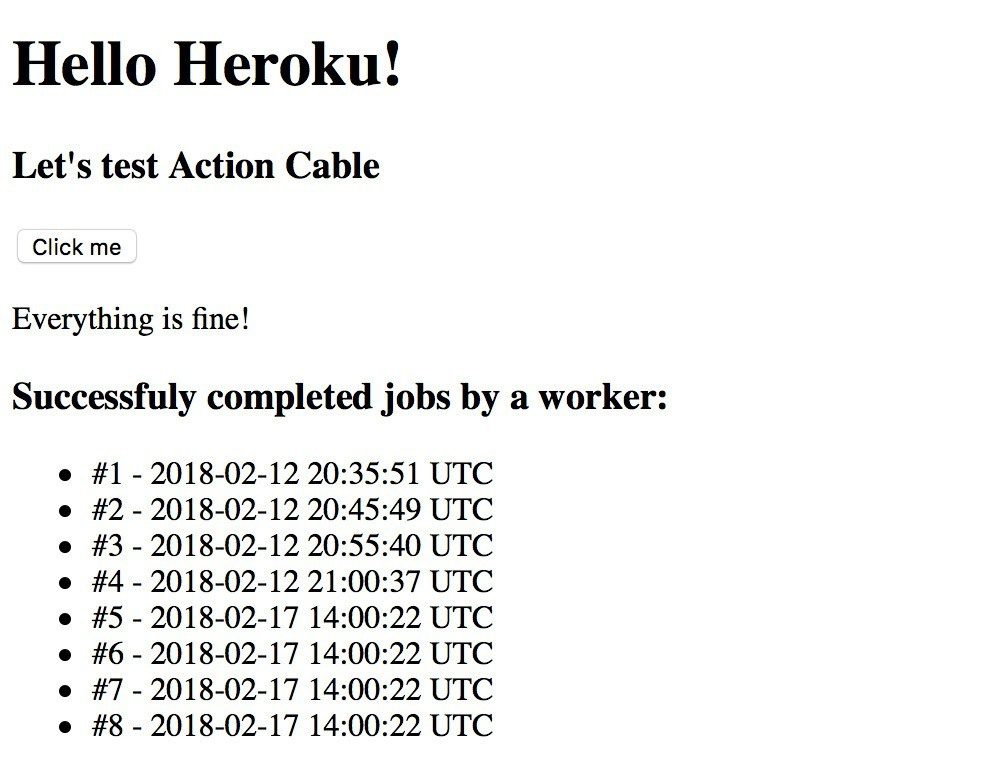
As you can see, there is a list of jobs which have been completed by Sidekiq. If you want to test Action Cable, just press the Click me button. If it works, it should return a message:
Conclusion
As you can see, setting a new application on Heroku isn’t so hard! I hope that you liked it! If you have any problems with the setup, feel free to add a comment below! The whole source code can be found here.