

As you've probably guessed by the title of my article, I still consider Ruby on Rails as a relevant technology that offers a lot of value, especially when combined with ReactJS as it's frontend counterpart. Here's how I approach the topic.
Gitlab Pipeline for Rails is the main part of a powerful GitLab CI/CD tool and can be a useful alternative for other applications like Jenkins and TeamCity. An important advantage of Gitlab CI/CD is that it’s an integral part of Gitlab, meaning you can keep your code, test, and perform deployment all in one place, removing the need for many other external tools. If you’re looking for some more detailed information on exactly how it works, we’ve compiled an example Gitlab pipeline configuration for you to check out. This example requires at least basic knowledge about Gitlab pipelines: how it works, how to define stages, jobs, etc. If you’re a little behind on this, take a look at this Getting Started post first.
Goals
Objectives to be achieved:
- Analyze static code in terms of style, security, complexity, etc.
- Check vulnerability and deprecations of gems.
- Run tests and check the coverage of the code.
- Generate ERD of current version of database.
- Present results in an accessible form.
- Deploy code in the proper place.
- Avoid redundancy.
- Ensure all of the above runs as fast as possible.
Gems
In order to reach these objectives, we need a couple of libraries. This is our gem team:
- Rubocop Rails – static code analyzer and code formatter.
- Brakeman – static analysis tool for security vulnerabilities.
- Dawnscanner – source code scanner also for security issues.
- Bundler Audit – checks for vulnerable and insecure versions of gems.
- RSpec – testing framework.
- Rails ERD – generates diagrams based on your Active Record models.
- SimpleCov – code coverage analysis tool.
Gitlab Pipeline Configuration Script
Stages
To begin our gitlab pipeline configuration, let’s split our goals into stages. In our example we will define 4 of them:
- build: in this stage, we will check if the code style meets the rules (with the help of Rubocop) and if assets could be precompiled without errors.
- test: this stage will be for testing our application in every possible way (unit tests, coverage, security issues, etc.)
- report: here, we’ll present the results of the previous stage in an easily digestible form.
- deploy: the last one, as the name suggests, will be reserved for deployment.
So here is how our stages configuration looks:
Parent jobs
To avoid some of the redundancy, Gitlab gives you a before_script option, which allows you to configure server, database, install gems, etc. before every job. But some jobs don’t require e.g. a configured database, so to speed up preparing an environment for these jobs, you can create hidden jobs with different options and every task will inherit from them.
Base hidden job
This job will be the parent of every other job, so here let’s set all the things required for each one: Docker image, installing bundler, gems, etc.
Base hidden job with configured database
In order to avoid repeating the image option, you’ll inherit this job from .base. Unfortunately, there’s no option to just append the script to the already defined before_script in .base job, so you have to repeat two lines:
Instead of extends keyword, it is possible to use YAML Anchors but the above approach is, in my opinion, more readable and elegant.
Rubocop
Rubocop doesn’t require a connection to the database, so you can simply inherit from .base. A configuration of this job is very simple and looks like this:
Assets precompile
rake assets:precompile requires more things like Node.js to be installed, that’s why we inherited from .base_db in this case:
Bundle audit
Failing this job shouldn’t fail the whole pipeline, as it should be just an alert to point out some of the gems require attention, so you’ll need to set an allow_failure flag to avoid this.
Brakeman and Dawnscanner
Brakeman and Dawnscanner gems generate reports, so let’s add them to the artifacts (read more about artifacts here). The artifacts should be generated in particular when the reports fail, so make sure to add the option when: always to ensure this. So as not to run this job on every single commit, you can limit this job to only master branch, for example. A complete configuration of these jobs looks like this:
Pages
In order to present the above reports in an accessible form, we decided to use pages, and from here you can add links to particular reports in README or another page. Keep in mind that Gitlab Pages are accessible to everyone, no matter whether the project is public or private. This is good for open source projects only, because from the coverage report, for example, you can copy the whole source code. For now, however, there is no such possibility to add authentication to pages, which is a current hot topic of debate. The job below will create the following endpoints:
- <username>.gitlab.io/<projectname>/brakeman
- <username>.gitlab.io/<projectname>/coverage
- <username>.gitlab.io/<projectname>/dawnscanner
- <username>.gitlab.io/<projectname>/erd.pdf
Deployment
In the Gitlab Pipeline, you can also perform deployments. In this example, we used two types of deployment process configurations: automatic (on staging) and manual (on production). When we pushed some code to staging branch, any job with deployment script will be triggered automatically as a usual pipeline job:
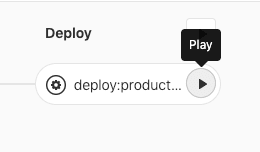
In the case of deployment to production, we will use a when: manual option, and to trigger this job, hit the play button near the job name on the Pipeline graph (or Jobs page):
You can also add environment options so that after deploy, the link to production page will appear in various places in GitLab which, when clicked, will take you to the defined URL. The final configuration of deploy:production looks like this:
Improvements
Cache
Gitlab offers a caching system which can be used to significantly speed up the running time of jobs. In our example, we cached gems and Linux packages. To define the cache, we added the option to our .base job:
You’ll also need to update the installing gems and packages to use the cache, so your parent jobs should now look like this:
By my tests, cache improves the running time of every job by 1:09 minutes on average.
Cache policy
With the above configuration, the cache is pulled at the beginning of every job, and at the end, it’s built from scratch and saved. We can improve this process using a cache policy option. Note that it’s enough to build a cache once you’re through the whole pipeline, and in every job, it’s enough just to pull it. To set this behavior, let’s update the cache option in .base job:
Now, the cache is only pulled and extracted at the beginning of every job, but not actually built anywhere. Let’s add building the cache to the build:rubocop job, as an example:
In my experiences, this improvement speeds up every job by 1:41 minutes on average in relation to a version without any cache at all.
Number of stages
In Gitlab Pipeline there is no possibility to share Docker machines between stages, so machines have to be pulled and configured from scratch each time for every job. Jobs in one stage can run parallel, whereas jobs from different stages don’t, so in order to speed up the whole pipeline, you should have as few stages as possible.
In our example, we could have moved jobs from the build stage to test, thereby decreasing the number of stages by one, but if, for example, somebody forgot to remove binding.pry from the code, Rubocop would already fail in the first stage and the pipeline wouldn’t move to the next one, otherwise the whole pipeline would hang on RSpec job until timeout. I chose the lesser evil in this case. The increase in speed in this improvement is equal to the longest job in the removed stage and potentially even better, because sometimes jobs don’t start simultaneously.
Smaller Docker image
Let’s take a closer look at the pages job. The only work of this task is to move artifacts to another place (public/ directory). Note that the only command needed by this job is mv, which is in every Linux distro. Instead of pulling a big Docker image with Ruby installed, you can simply pull the smallest possible image. It’s important to note that we are not using a cache at all, so this feature can also be disabled. Let’s do this and create a .base_minimal hidden job with Alpine Linux as its image (only 5 MB size!) and cache disabled for all:
And then, update the pages job:
Final version
Below you can see the final version of Gitlab Pipeline configuration file with the improvements mentioned above:
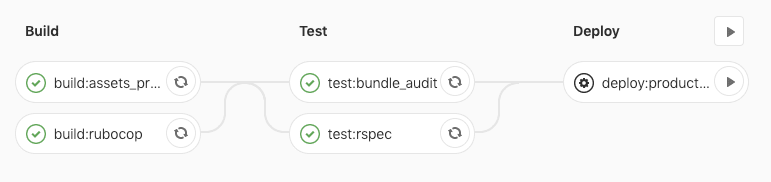
Below you can see how the Pipeline graphs look depending on different branches:
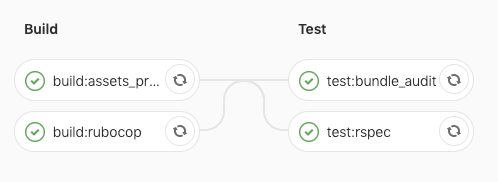
Branches not specified in the config file (e.g. feature/1)
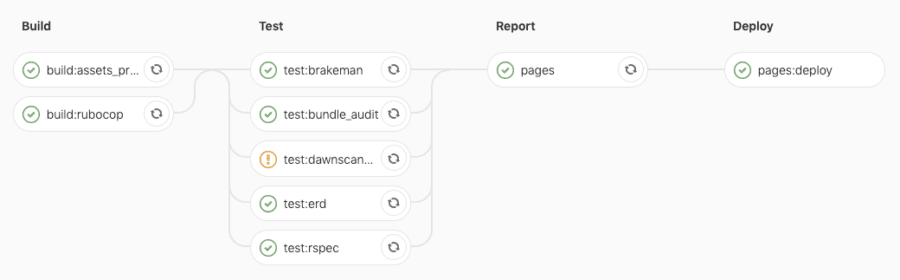
master
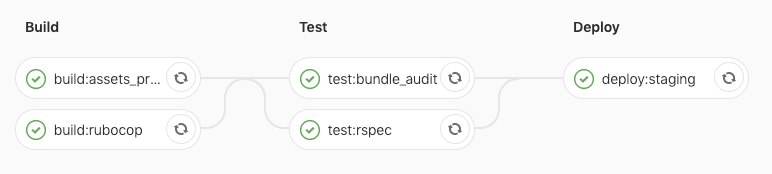
staging
production
Summary
Now that you’ve seen an example of a Gitlab Pipeline configuration, we hope you feel a little more clued up on how it works, the different variations of configuration, and their results. There are other ways in which Gitlab Pipeline is also powerful and flexible, so if you’d like to learn more, click here.