
As you've probably guessed by the title of my article, I still consider Ruby on Rails as a relevant technology that offers a lot of value, especially when combined with ReactJS as it's frontend counterpart. Here's how I approach the topic.
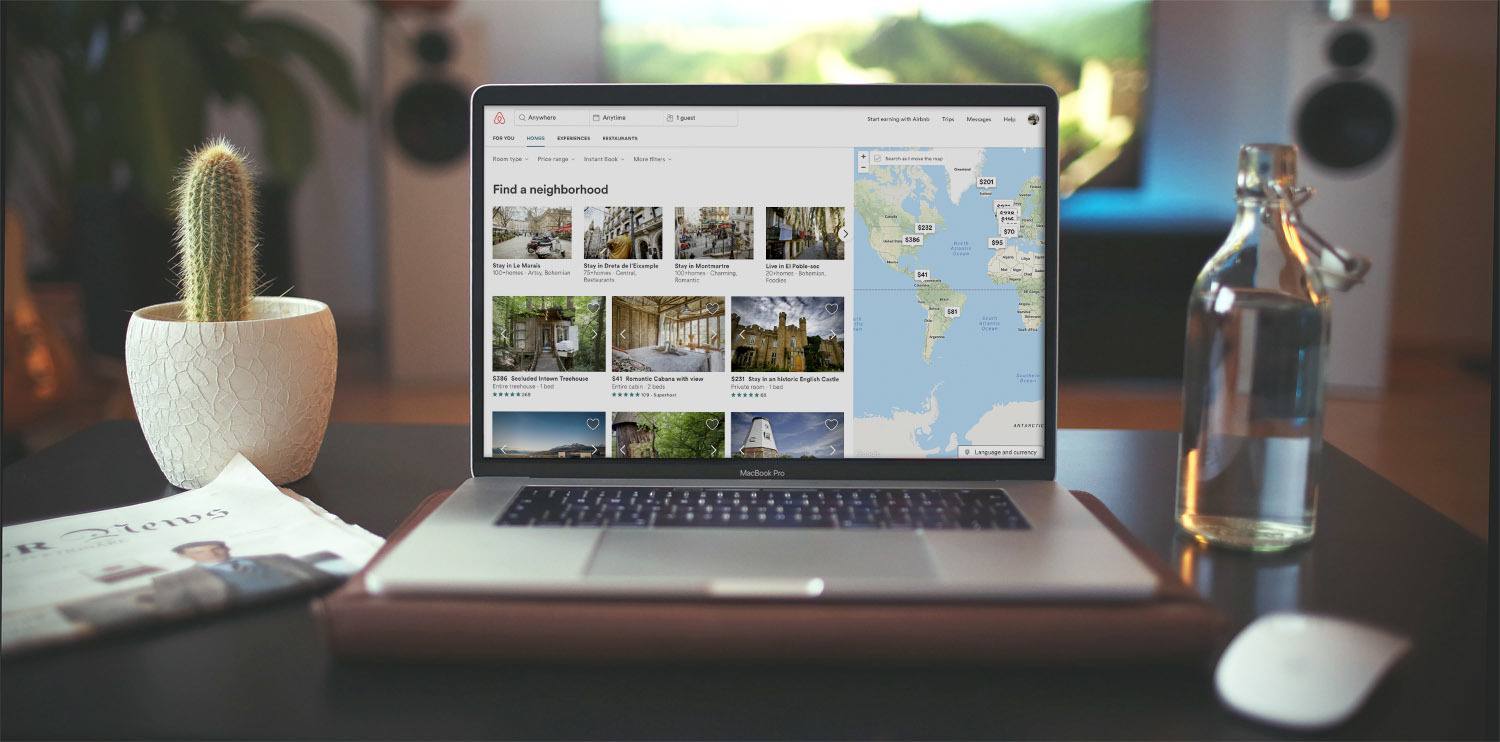
Honestly, I’ve always wanted to create something like the Airbnb map. It looks really great, when you drag and drop on it, it reloads the data and shows all available apartments on the map with prices. It’s a great example of using a front-end framework to build a map and creating a separate back-end app which returns only data passed to the front-end. In this tutorial, I’ll show how to create a map like the Airbnb map.
So once again, to sum it up – which features does it have? Well, when it initializes, it fetches all available apartments which are on a map from the back-end. Also, when you change the location of the map, like dragging, dropping, or zooming it, all places are reloaded from the back-end. Moreover, when you click on a marker on the map, it shows basic info about an apartment. It looks like:

Yeah, we will create the map which looks like the map above, with the same features. We won’t focus on the design, we will keep it simple.
We will build two applications, one will be responsible for the front-end part – React app. The second application – our API, back-end, will be written in Rails 5 API.
Everything will be connected together, so the front-end application will fetch data from the back-end application. It’s much easier to work on to different applications, everything is separated. Later there is not one huge application which you need to maintain. Back-end and front-end are independent, which is really great. You don’t need to care about their dependencies or install front-end libraries via bundler or rails-assets.
Back-end
We will separate our application to a back-end and front-end. The back-end will be responsible for providing data via API to the front-end, that’s all – nothing more, only one responsibility 🙂
One more important thing about the code snippets – when you notice the three dots (…), it means that there is a code from the previous snippet, which you don’t need to change, I’m not adding it to make a snippet clear.
Let’s generate new Rails 5 API application without views, we just need JSONs:
$ rails new airbnb_map_backend --api
Let’s update our Gemfile:
source 'https://rubygems.org'

git_source(:github) do |repo_name|
  repo_name = "#{repo_name}/#{repo_name}" unless repo_name.include?("/")
  "https://github.com/#{repo_name}.git"
end

gem 'rails', '~> 5.1.3'
gem 'sqlite3'
gem 'puma', '~> 3.7'
gem 'faker'

group :development do
  gem 'listen', '>= 3.0.5', '< 3.2'
  gem 'spring'
  gem 'spring-watcher-listen', '~> 2.0.0'
end
Now let’s install all gems via bundler:
$ bundle install
What do we need?
The first thing – do we know what we need? We need only a simple model which keeps data connected to a flat/apartment like on Airbnb, so price, home name, description and of course longitude and longitude (we need to visualize them on a map). Ok, so let’s create a model called a “place”.
$ rails g model Place longitude:decimal latitude:decimal description:text name:string price:decimal
$ rake db:migrate
We have a model which is not complete yet. We also need routes and a controller! Let’s start with routes. We just need an index action, nothing more. Oh wait, we also need an api namespace inside our routes:
Rails.application.routes.draw do
  scope :api do
    resources :places, only: [:index]
  end
end
The search method
Now let’s update our model, what we need here is a method which gets data when passed longitude and longitude. We won’t search by a place name or something like this. Google Maps provides in their API something like minimum and maximum longitude and latitude:
class Place < ApplicationRecord
  scope :by_longitude, -> (min, max) { min && max ? where('longitude >= :min AND longitude <= :max', min: min, max: max) : all }
  scope :by_latitude, -> (min, max) { min && max ? where('latitude >= :min AND latitude <= :max', min: min, max: max) : all }

  API_RESULTS_LIMIT = 100

  def self.search(min_lat:, max_lat:, min_lng:, max_lng:)
    by_latitude(min_lat, max_lat).
      by_longitude(min_lng, max_lng).
      limit(API_RESULTS_LIMIT)
  end
end
The search method returns all places between passed params, so between min_lat, max_lat, min_lng and max_lng.
We limit returned results to 100. Why do we limit them? Well, imagine a lot of records on a small piece of a map, it would be really unreadable. It’s not about performance, we can add indexes to these fields, cache them somehow or even use a tool designed and built for really efficient search engines, like Solr or ElasticSearch.
When we zoom the map, we will render all records located near a center point. Check out how it works on Airbnb, they use an algorithm to filter their apartments on a page load, later, when you zoom the map, they render the rest.
Now let’s add a controller (places_controller.rb) which will return a JSON file based on passed params:
class PlacesController < ApplicationController
  def index
    places = Place.search(search_params.to_h.symbolize_keys)
    render json: places
  end

  private

  def search_params
    params.permit(:min_lng, :max_lng, :min_lat, :max_lat)
  end
end
Nothing complicated here, we use strong params to pass only these, which we really want to pass to the search method. Remember to use the symbolize_keys method in order to pass a formatted hash, like { a: 1, b: 2 }, not { “a” => 1, “b” => 2 } – with the second hash our method will have problems reading it.
Ok, we have everything ready but were missing data! Yeah, we need to return something to the front-end! Let’s add some records using Rails’ seeds. To generate random names we gonna use the faker gem. Also, all places will be created around one main point, +-5 degrees.
center_point = { lat: 50.0515918, lng: 19.9357531 }

1.upto(1000) do |i|
  Place.create!(
    name: Faker::Address.city,
    description: Faker::Lorem.paragraph(8),
    longitude: center_point[:lng] + rand(-10.00..10.00),
    latitude: center_point[:lat] + rand(-10.00..10.00),
    price: rand(1..500)
  )
end
Running Puma
Great, our back-end is ready. One more thing, please use Rails server on a different port than 3000, we will use it with React. You can use for example 4000 port. Remember, that we use Puma, so you need to add a PORT variable before the rails server command. Using the -p attribute in the rails server command won’t work.
$PORT=4000 rails server
You can find the full source code here.
Front-end
Let’s start with installing the create-react-app tool which creates a scaffold app for us, it already includes React and the folder structure:
$ npm install -g create-react-app
Ok, now generate a new, fresh app:
$ create-react-app airbnb_map_front-end
$ cd airbnb_map_front-end
You can start it by running:
$ npm start
A new browser tab/window should be opened. It’s auto-reloading our app, so there is no need to rerun the server – only when you change something in the package.json file, I recommend you rerun it to reload everything once again.
First component
Let’s make some small cleanups to our app. We will remove unneeded code to make the start files thinner. Start with cleaning the App.js:
import React, { Component } from 'react'
import './App.css'

class App extends Component {
  render() {
    return (
      <div>
        Map
      </div>
    );
  }
}

export default App
Then remove App.test.js, index.css, logo.svg, registerServiceWorker.js and update index.js:
import React from 'react';
import ReactDOM from 'react-dom';
import App from './App';

ReactDOM.render(<App />, document.getElementById('root'));
Great, our file tree and files look much cleaner! Awesome!
Now let’s create our first, simple component called Map.js under src/components:
import React, { Component } from 'react'

export class Map extends Component {
  render() {
    return(
      <div>
        Map
      </div>
    );
  }
}

export default Map
As you probably noticed, we moved the content of the App component to the Map component. Now let’s update the App component. For now, it only wraps the main Map component inside the render method:
import React, { Component } from 'react'
import { Map } from './components/Map'
import './App.css'

class App extends Component {
  render() {
    return (
      <Map />
    );
  }
}

export default App
Google Map library
Our first component is ready, let’s modify it and display an empty Google Map.
First of all, we need to install the Google Maps library inside our project. How can we do it? Using npm, it’s called react-google-maps. One important thing here, please go with 7.3.0 version, in the newest one I had some problems with the custom marker.
$ npm install --save [email protected]
Great, we have already installed the library with customs components. Now, we need to include the official Google Maps source code.
Please add it to the public/index.html file:
<script type="text/javascript" src="https://maps.googleapis.com/maps/api/js?v=3.28&libraries=places,geometry"></script>
Awesome! As I mentioned in the beginning, we want to display a simple Google Map. Let’s do it! I’ll be using ES6 syntax, I hope that you’re familiar with it, if not, please check this site.
First of all, we need to include the library in our component. Then, we need to render it in the render method. We should define a center point (lng, lat) and a map zoom. There is the one really important thing – each time we update a component’s state, our map will be rerendered. We don’t want to re-render the map, only components on it. How can we achieve it? By defining a GoogleMap component (from the react-google-maps library) outside the Map component, wrapped in the withGoogleMap method provided by the library.
Ok, let’s do it!
import React, { Component } from 'react'
import { withGoogleMap, GoogleMap } from 'react-google-maps'

const AirbnbMap = withGoogleMap(props => (
  <GoogleMap
    defaultCenter={props.center}
    defaultZoom={props.zoom} />
));

export class Map extends Component {
  constructor(props) {
    super(props)

    this.zoom = 7

    this.state = {
      lat: 50.0515918,
      lng: 19.9357531
    };
  }

  render() {
    const {lat, lng} = this.state;

    return(
      <div style={{width: `750px`, height: `750px`}}>
        <AirbnbMap
          center={{
            lat: lat,
            lng: lng
          }}
          zoom={this.zoom}
          containerElement={
            <div style={{ height: `100%` }} />
          }
          mapElement={
            <div style={{ height: `100%` }} />
          }
        />
      </div>
    );
  }
}
As you can see, we set a state with a default lng and lat. We don’t need to do it with the zoom – we won’t change it, it’s only used for the initialization process. Yeah, as I mentioned before, we return in the render method the Airbnb map instance, defined outside the Map component.
Great, please visit your browser, you should be able to see an empty map!
Place Marker
We have our map, now let’s display something real, our first marker! Let’s add the PlaceMarker component. It’ll render only a simple Marker based on passed lng and lat via props:
import React, { Component } from 'react'
import { Marker } from 'react-google-maps'

export class PlaceMarker extends Component {
  render() {
    const {lat, lng} = this.props

    return(
      <Marker
        position={{
          lat: parseFloat(lat),
          lng: parseFloat(lng)
        }}
      />
    );
  }
}

export default PlaceMarker
Now we need to include it in the Map component and render it in the GoogleMap:
...
import { PlaceMarker } from './PlaceMarker'

const AirbnbMap = withGoogleMap(props => (
  <GoogleMap
    ...>
    {props.places}
  </GoogleMap>
));

export class Map extends Component {
  ...
  render() {
    ...
    const places = [<PlaceMarker lat={lat} lng={lng} price={20} />]

    return(
      <div style={{width: `750px`, height: `750px`}}>
        <AirbnbMap
          ...
          places={places}
          ...
        />
      </div>
    );
  }
}
If you did everything correctly, you should be able to see a marker!
If you’ve visited Airbnb or read this tutorial from the beginning, you probably know that when you click on one of their map’s markers it shows a window with an apartment’s info, like price, description, and name. Let’s add this feature now. When you click on a marker, we gonna open or close an info window.
Add in the PlaceInfoWindow component. It will display a basic info, nothing special. Also when you will click on the “x”, it will be closed.
import React, { Component } from 'react'
import { InfoWindow } from 'react-google-maps'

export class PlaceInfoWindow extends Component {
  render() {
    const {description, name, price} = this.props

    return(
      <InfoWindow onCloseClick={this.props.closeWindow}>
        <div>
          <h1>{name}</h1>
          <p>{description}</p>
          <span>${price}</span>
        </div>
      </InfoWindow>
    );
  }
}

export default PlaceInfoWindow
Now we need to modify the PlaceMarker component a little bit. First of all, we need to include the PlaceWindowComponent, then initialize via state, if a window is opened or closed. Also, implement methods which will be responsible for opening or closing the info window and render it when it should be visible.
...
import { PlaceInfoWindow } from './PlaceInfoWindow'

export class PlaceMarker extends Component {
  constructor(props) {
    super(props)

     this.state = {
      showTooltip: false
    }
  }

  clickTooltip() {
    this.setState({ showTooltip: !this.state.showTooltip })
  }

  closeWindow() {
    this.setState({ showTooltip: false })
  }

  render() {
    const {showTooltip} = this.state
    const {lat, lng, name, price, description} = this.props

    return(
      <Marker
        ...
        onClick={this.clickTooltip.bind(this)}>
        {showTooltip && (
          <PlaceInfoWindow description={description}
                           name={name}
                           price={price}
                           closeWindow={this.closeWindow.bind(this)}/>
        )}
      </Marker>
    );
  }
}

export default PlaceMarker
One more thing, we need to pass name and description too! Modify the places const in the Map component, to:
const places = [<PlaceMarker lat={lat} lng={lng} price={20} name={"Hotel"} description={"Hotel desc"} />]Now, when you click on a marker, an info window should appear! You can also close it by clicking on it or on the ‘x’.

Zoom, drag and drop the map and save its coordinates
Ok, now let’s focus on drag and drop and map zoom. As I told at the beginning, when you drag and drop or zoom the Airbnb map, it gets data from the back-end and rerender markers on a map based on a lng and lat.
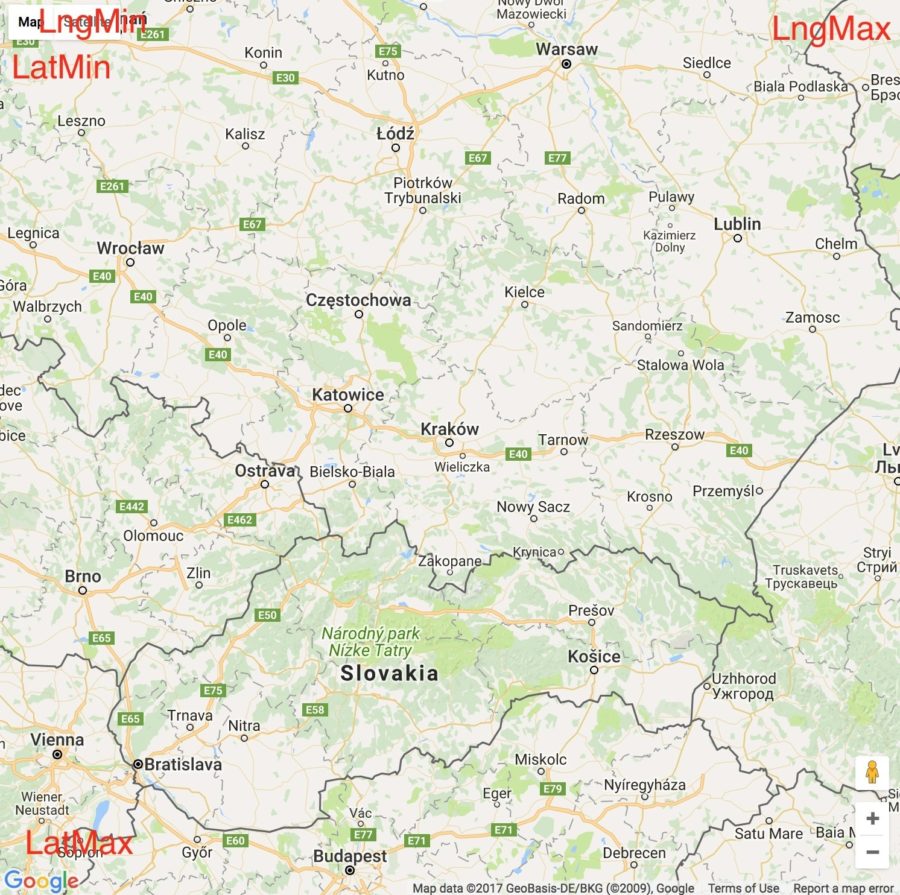
How can we do it? First of all, we need to get LngMin, LngMax, LatMin, LatMax and a map center point. Google Maps API allows us to get it by calling these methods:
- Center point: map.getCenter().lat() / map.getCenter().lng()
- Boundaries: map.getBounds().b – x axis / map.getBounds().f – y axis
When should we do it? Well, there is one main problem. Our code runs faster than a map fully loads (map image), so unless it loads, we can’t run the getBounds() method – we don’t know boundaries yet!
How can we solve it? Google Maps API has a listener called onBoundsChanged. All possible actions, listeners and functions can be found in the official documentation.
Let’s go back to the onBoundsChanged function – when a map’s boundaries are changed, this function is called. So when the map fully loads for the first time, we can mark that the map has fully loaded and set boundaries and a center point. You should know one thing, every time when you move your map and even if a location is changed by one minute, this function is called. So we should prevent it from calling this function all the time and call it only when you move our map. We can set a flag which will notify that a map has fully loaded and that we don’t want to call this function.
We also need two other functions – onZoomChanged and onDragEnd.
- onZoomChanged triggers an event when you click on ‘+’ or ‘-’ button on the map.
- onDragEnd triggers an event when you drag and drop the map but ends the moment you stop dragging it.
Ok, so what do we want to achieve?
- When a map fully loads, mark that the map has loaded and store a map object somewhere in our class.
- When the map’s boundaries are changed (by zoom or drag and drop) store the center point and boundaries in our class so that we can make an API call with the coordinates.
- Make an API call.
- Render markers on the map.
Pretty easy, right?! So let’s implement these features!
...
const AirbnbMap = withGoogleMap(props => (
<GoogleMap
ref={props.onMapMounted}
onZoomChanged={props.handleMapChanged}
onDragEnd={props.handleMapChanged}
onBoundsChanged={props.handleMapFullyLoaded}
...
>
{
props.places.length > 0 && props.places.map(place => (
<PlaceMarker lat={50.0515918}
lng={19.9357531}
description={'Description'}
name={'Hotel'}
price={'10'} />
))
}
</GoogleMap>
));
export class Map extends Component {
constructor(props) {
...
this.xMapBounds = { min: null, max: null }
this.yMapBounds = { min: null, max: null }
this.mapFullyLoaded = false
this.zoom = 7
this.state = {
places: [],
...
};
}
handleMapChanged() {
this.getMapBounds()
this.setMapCenterPoint()
this.fetchPlacesFromApi()
}
handleMapMounted(map) {
this.map = map
}
handleMapFullyLoaded() {
if (this.mapFullyLoaded)
return
this.mapFullyLoaded = true
this.handleMapChanged()
}
setMapCenterPoint() {
this.setState({
lat: this.map.getCenter().lat(),
lng: this.map.getCenter().lng()
})
}
fetchPlacesFromApi() {
const place = <PlaceMarker lat={50.0515918} lng={19.9357531} price={20} name={"Hotel"} description={"Hotel desc"} />
this.setState({ places: [place] })
}
getMapBounds() {
var mapBounds = this.map.getBounds()
var xMapBounds = mapBounds.b
var yMapBounds = mapBounds.f
this.xMapBounds.min = xMapBounds.b
this.xMapBounds.max = xMapBounds.f
this.yMapBounds.min = yMapBounds.f
this.yMapBounds.max = yMapBounds.b
}
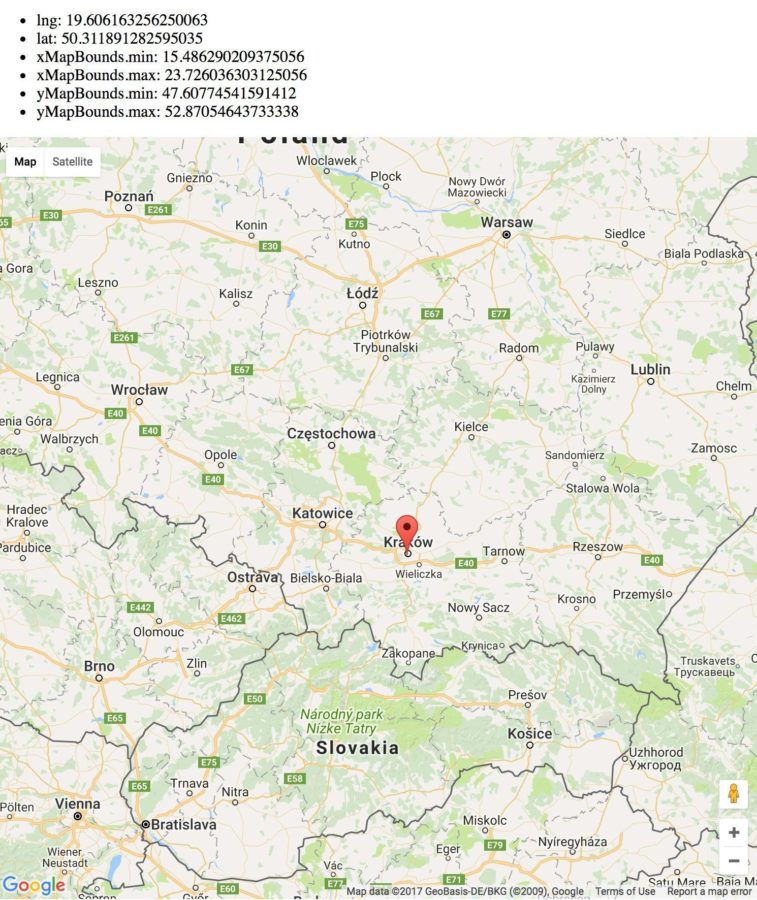
render() {
const {lat, lng, places} = this.state
return(
<div style={{width: `750px`, height: `750px`}}>
<ul>
<li>lng: {lng}</li>
<li>lat: {lat}</li>
<li>xMapBounds.min: {this.xMapBounds.min}</li>
<li>xMapBounds.max: {this.xMapBounds.max}</li>
<li>yMapBounds.min: {this.yMapBounds.min}</li>
<li>yMapBounds.max: {this.yMapBounds.max}</li>
</ul>
<AirbnbMap
onMapMounted={this.handleMapMounted.bind(this)}
handleMapChanged={this.handleMapChanged.bind(this)}
handleMapFullyLoaded={this.handleMapFullyLoaded.bind(this)}
...
/>
</div>
);
}
}What have we added here? Let’s start from the Map class, we will come back later to the AirbnbMap class. In the constructor in the state we added an array called places, which will store all apartments/places/flats visible in a map area.
We added xMapBounds and yMapBounds params which stores the map boundaries coordinates. Also, there is a mapFullyLoaded flag, which informs if a map has fully loaded.
handleMapChanged function is called when the map boundaries have been changed and it calls three different functions:
- getMapBounds – the function which gets and sets map boundaries
- setMapCenterPoint – the function which gets and sets the center point
- fetchPlacesFromApi – the function which every time, for now, creates a one marker
We also added the function called handleMapMounted – it assigns to the this.map value a map object during the map initialization.
The handleMapFullyLoaded function marks that the maps have fully loaded and calls the handleMapChanged function to get the latest data.
There is also a list rendered on the front end, which keeps all assigned coordinates in all variables, to show that when you change a map’s area, everything is updated.
We also need to pass these functions to the AirbnbMap class (handleMapMounted, handleMapChanged, handleMapFullyLoaded).
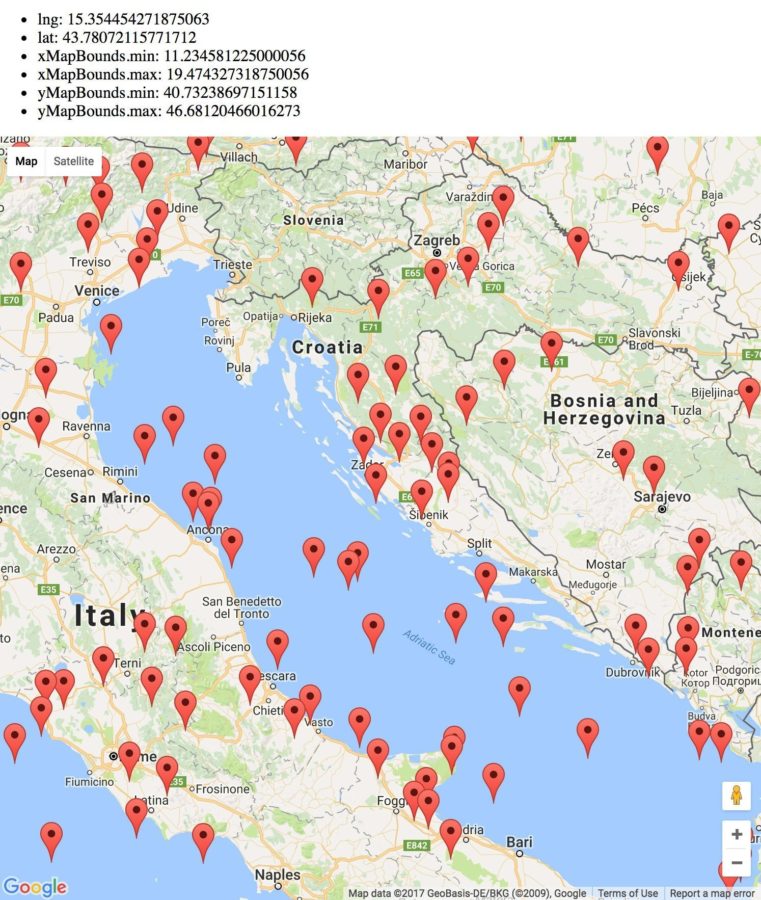
Let’s go back to the AirbnbMap. As you can see we pass the onMapMounted function as ref in order to save a map object somewhere in our class. Also, we call onZoomChanged, onDragEnd and onBoundsChanged functions from the Google Maps API to run passed functions via props to the AirbnbMap class from the Map class.
Inside the AirbnbMap, we render all passed places as markers on the map, when they exist.
If you did everything correctly, you should see something like:
Fetch data from the API
Everything is almost done but still, we don’t have real data rendered on our map. Let’s finally integrate our back-end with the front-end!
First of all, in order to make possible Xhr calls between front-end and back-end add to the package.json one line which allows accessing back-end:
"proxy": "http://localhost:4000"
Please restart your npm server to reload the config file!
We point our React app to the back-end endpoint. Remember to run the back-end on the same endpoint you added in the package.json file!
Ok, now let’s change the fetchPlacesFromApi function to get data from our back-end:
...

const AirbnbMap = withGoogleMap(props => (
  <GoogleMap
    ...
  >
    {
      props.places.length > 0 && props.places.map(place => (
        <PlaceMarker key={`place${place.id}`}
                     id={place.id}
                     lat={place.latitude}
                     lng={place.longitude}
                     description={place.description}
                     name={place.name}
                     price={place.price} />
      ))
    }
  </GoogleMap>
));

export class Map extends Component {
  ...

  fetchPlacesFromApi() {
    this.setState({ places: [] })

    fetch(`/api/places?min_lng=${this.xMapBounds.min}&max_lng=${this.xMapBounds.max}&min_lat=${this.yMapBounds.min}&max_lat=${this.yMapBounds.max}`,
      { method: 'GET' })
      .then((response) => response.json())
      .then((response) => this.setState({ places: response }))
  }

  ...
}
As you can see, we make a simple HTTP GET call with all needed params to get a JSON. Then we convert a response to a JSON and set rendered data as places. At the beginning, I recommend cleaning our array, as I do before the HTTP call.
Moreover, we need to add more params which are passed to the PlaceMarker component in the AirbnbMap – the most important is unique key!
We need to also add new keys in the PlaceMarker and pass to the PlaceInfowIndow component. Let’s do it:
...

export class PlaceMarker extends Component {
  ...

  render() {
    ...
    const {lat, lng, name, price, description, id} = this.props

    return(
      <Marker
        ...
        key={`marker${id}`}>
        {showTooltip && (
          <PlaceInfoWindow key={`info${id}`}
                           description={description}
                           name={name}
                           price={price}
                           closeWindow={this.closeWindow.bind(this)}/>
        )}
      </Marker>
    );
  }
}

export default PlaceMarker
Yeah, we finally have data rendered directly from the back-end! Try to drag and drop with the map in order to fetch different markers.
Style Map Markers
There is one more step – we need to add some styles to our markers, to make them similar to the Airbnb ones. In order to do it, we need to import an extra library.
Please add the following script tag to the public/index.html file, after the Google Maps script tag:
<script type="text/javascript" src="https://cdn.rawgit.com/googlemaps/v3-utility-library/master/markerwithlabel/src/markerwithlabel.js"></script>
Now styles…. Add them to the App.css:
.map-price-container {
  overflow: visible !important;
}

.map-price-marker {
  position: absolute;
  font-family: 'Helvetica';
  left: -37px;
  top: -25px;
  width: 70px;
  height: 20px;
  border-radius: 3px;
  line-height: 22px;
  background-color: white;
  box-shadow: 0 2px 3px 0 rgba(0, 0, 0, 0.07);
  text-align: center;
  color: black;
  font-size: 12px;
  font-weight: 700;
  border: 1px solid gray;
  z-index: 1;
}
.map-price-marker:before,
.map-price-marker:after {
  position: absolute;
  content: "";
  border-style: solid;
}

.map-price-marker:after {
  left: 31px;
  top: 19px;
  border-width: 5px;
  border-color: white transparent transparent;
}

.map-price-marker:before {
  left: 30px;
  top: 20px;
  border-width: 6px;
  border-color: gray transparent transparent;
}

.map-price-marker.visited:hover {
  background-color: #7b8d93;
  color: #fff;
  border-color: #5b6a6f;
}

.map-price-marker.visited:hover:after {
  border-color: #7b8d93 transparent transparent;
}

.map-price-marker.visited:hover:before {
  border-color: #5b6a6f transparent transparent;
}

.map-price-marker:hover {
  background-color: #f2f2f2;
  color: black;
  border-color: gray;
  z-index: 3;
}

.map-price-marker:hover:after {
  border-color: #f2f2f2 transparent transparent;
}

.map-price-marker:hover:before {
  border-color: gray transparent transparent;
}
We need to also add extra keys which we pass to the Marker component in the PlaceMarker. We must specify marker class, inform it that we want to display a custom marker, hide the default one (set capacity to 0) and add the marker’s content.
Please add the following keys:
...
export class PlaceMarker extends Component {
...
render() {
...
return(
<Marker
...
markerWithLabel={window.MarkerWithLabel}
opacity={0}
labelClass='map-price-container'
labelContent={`<div class="map-price-marker"><span>$${price}</span></div>`}
...>
...
</Marker>
);
}
}
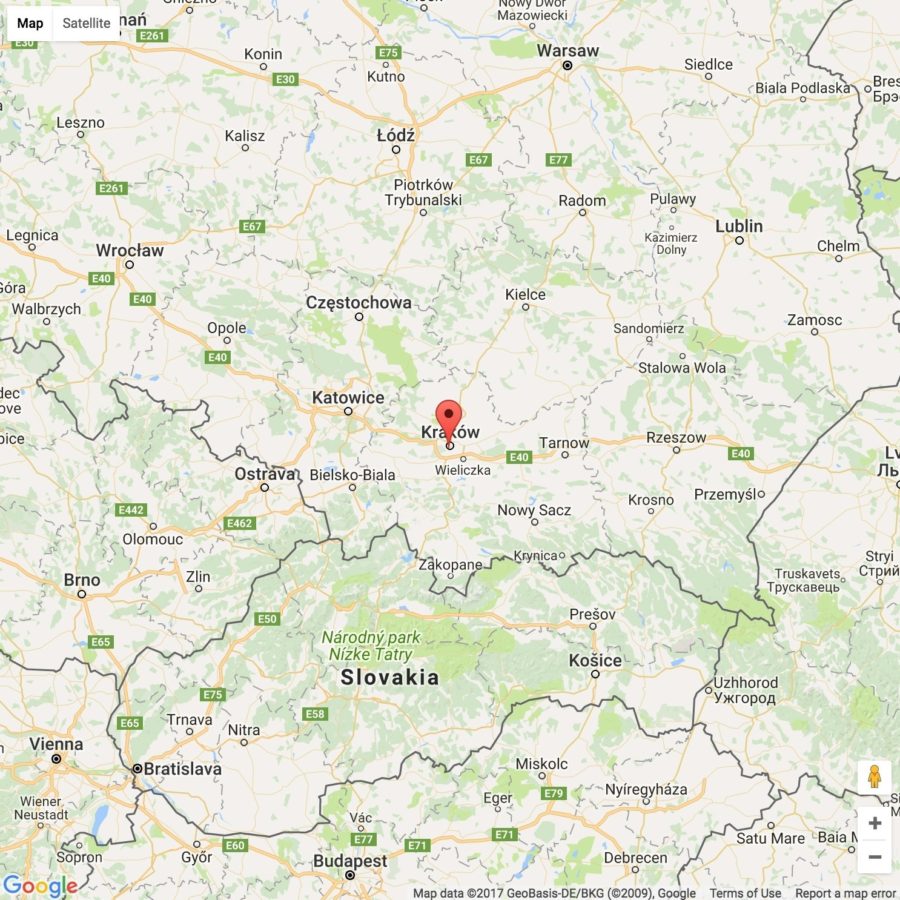
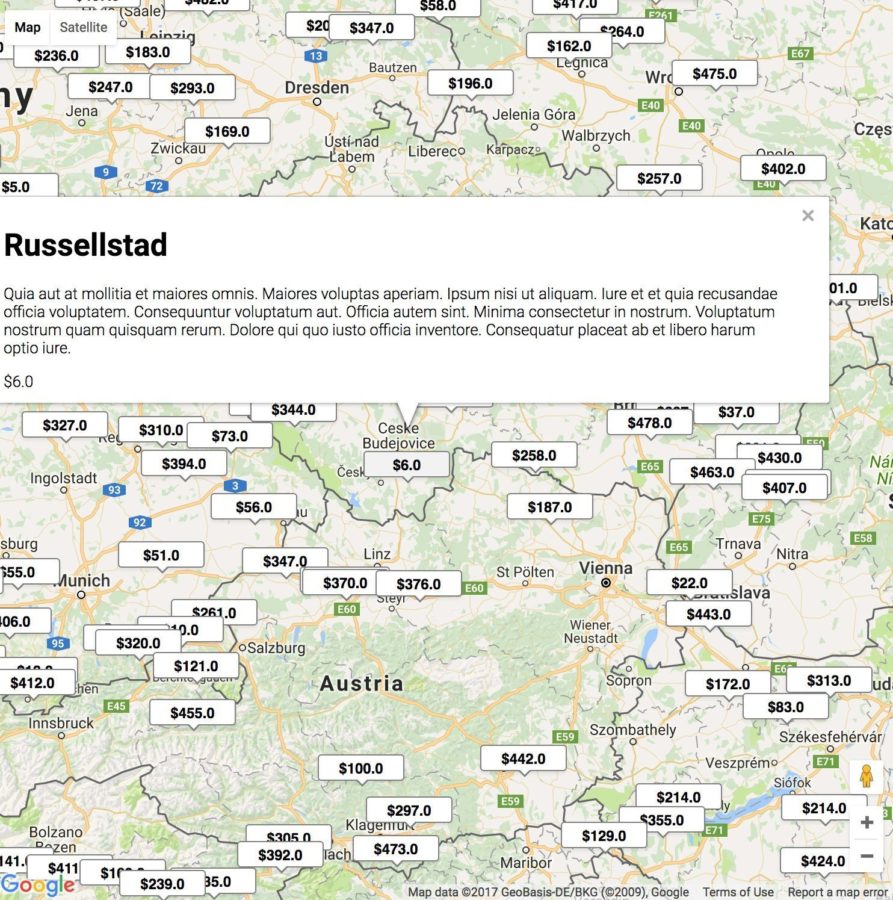
export default PlaceMarker;Great, you’re almost done! The last step is to remove the ul tag from the Map component, we don’t need it anymore! After this step, you should see markers like these:
The front-end part source code can be found here.
Summary
Yeah, you did it! We created the map which looks like this one from Airbnb. It wasn’t really hard with Rails 5 API on the back-end and React.js with React-Google-Maps on the front-end.
If you have any questions, suggestions please add comments below.
If you want to extend our map somehow and you’d like a follow up of this tutorial, feel free to post it below. I hope that you liked this tutorial and it will be useful to you!