
As you've probably guessed by the title of my article, I still consider Ruby on Rails as a relevant technology that offers a lot of value, especially when combined with ReactJS as it's frontend counterpart. Here's how I approach the topic.
Does your application have problems with timeouts or some requests, like data generation, taking too much time? Or maybe you want to connect your results from Sidekiq to the front-end part – for example: you could notify a user, that data he requested is ready to download or display. This sends a normal Facebook like notification after a job runs successfully.
If the answer is yes, this tutorial is for you!
Introduction
I’ll cover Sidekiq, Pusher, how to connect them together on the back-end and front-end and explain the benefits of using them together.
Let’s start! I guess that you probably know something about Sidekiq or even Pusher – if not, there here is short introduction for you.
Sidekiq is a simple background job processor written in Ruby. It is considerably more efficient than Resque or DelayedJob. But what does that mean? This tool allows you app to process Ruby code in the background, without conflicting with the incoming requests to it’s server. You can process some huge SQL queries, generate a file, upload it later to S3, etc. – the sky is the limit!
Pusher is a tool used to build a realtime apps with features like chat or a file upload progress bar. You can implement some code on your back-end, process it and later send a result to your front-end using web-sockets. That it’s what Pusher does!
How can we connect them? It’s really simple, we need to send/stream a result via a websocket from our backend to the specific channel and room to the front-end. So basically the front-end waits for a data on the specific websocket. After receiving the data, it does something with the result, render etc.
What are the real world examples? For example a chat, a video conference, a notifications system, a live data stream or even more! More examples with the great tutorials can be found here. All these features can be built with Pusher, awesome!
Application introduction
Ok, now you know more about both tools let’s talk about the app we’re going to build. We’ll do a simple skeleton and connect Sidekiq and Pusher. Basically, we will handle heavy data processing in Sidekiq and send a result to the front-end – in the realtime. I just want to show you a proof of concept, demonstrating how you can create something bigger and tailored to your needs.
Let’s create a new application:
$ rails new sidekiq_with_pusher
Now, please make a small cleanups in the Gemfile, we’ll keep only needed gems:
source 'https://rubygems.org'

git_source(:github) do |repo_name|
  repo_name = "#{repo_name}/#{repo_name}" unless repo_name.include?("/")
  "https://github.com/#{repo_name}.git"
end

gem 'rails', '~> 5.1.4'
gem 'sqlite3'
gem 'puma', '~> 3.7'
gem 'sass-rails', '~> 5.0'
gem 'uglifier', '>= 1.3.0'
gem 'redis', '~> 3.0'

group :development, :test do
  gem 'pry-rails'
end

group :development do
  gem 'listen', '>= 3.0.5', '< 3.2'
  gem 'spring'
  gem 'spring-watcher-listen', '~> 2.0.0'
end
Application setup
Let’s add the necessary ems to Gemfile:
gem 'sidekiq'
gem 'foreman'
gem 'jquery-rails'
As you probably know, jquery is no longer included in Rails, so we need to add it manually. We’ll use it to make AJAX requests, without writing too much code.
We also added Sidekiq and Foreman.
What is Foreman? It’s a gem which manages with Heroku’s Procfiles where we can define he services that will be executed in our application.
If you haven’t installed Redis, please install it now. You’ll need it to run Sidekiq, otherwise it won’t work:
$ brew install redis
If you’re not using macOS, here is the great tutorial which covers the installation process on Ubuntu.
Next add a Procfile which will run one process redis-server and Sidekiq:
redis: redis-server /usr/local/etc/redis.conf
worker: bundle exec sidekiq
Let’s install all added gems:
$ bundle install
Now let’s start our Procfile:
$ foreman start -f Procfile
Our application must have a controller and an action, let’s generate the HomeController. Also an index action which will handle file rendering, and a generate action which will gather all needed data for us:
$ rails g controller Home index generate
Now, let’s generate a worker which will gather everything together:
$ rails g sidekiq:worker Generator
Please update our routes to mark the index action as a root path and include the generate action:
Rails.application.routes.draw do
  root 'home#index'
  get 'home/generate'
end
Sign up for free
We don’t need Turbolinks, so let’s remove them from application.html.erb:
<!DOCTYPE html>
<html>
  <head>
    <title>SidekiqWithPusher</title>
    <%= csrf_meta_tags %>

    <%= stylesheet_link_tag    'application', media: 'all' %>
    <%= javascript_include_tag 'application' %>
  </head>

  <body>
    <%= yield %>
  </body>
</html>
Remove them from the application.js file as well and add the jQuery library:
//= require rails-ujs
//= require jquery
//= require jquery_ujs
//= require_tree .
Now try to start a server to check that everything is setup correctly.
$ rails server
Go to http://localhost:3000
Main processing logic – a service
We need to create the main logic of our application – a service which will be responsible for gathering a data or making anything as you want. We’ll create a mock it and pretend that these huge operations take a lot of time by using sleep for 30 seconds. Let’s pretend the we’re generating a pdf file, uploading it to a server and getting its url.
Let’s create a file_generator.rb file under app/services:
class FileGenerator
  def call
    process_data
    generate_file_url
  end

  private

  def process_data
    # imagine heavy sql queries, data processing
    sleep(30)
  end

  def generate_file_url
    'http://example.com/file.pdf'
  end
end
Now update the generate method under the home_controller.rb to call our service and return the 200 status code:
def generate
FileGenerator.new.call
head :ok
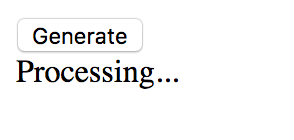
endPlease update the index.html.erb file and add a button, which will call the generate action:
<%= button_to "Generate", home_generate_path, id: 'generate_data' %>

<div id='result'></div>
We will call this via an ajax request. Before processing it, we will render that the request is processed and when it’s done, we’ll render a url to a PDF file. Let’s add it to the application.js:
...

$(document).on('ready', function() {
  $('#generate_data').click(function(event) {
    event.preventDefault();
    $.ajax({
      method: 'GET',
      url: '/home/generate',
      beforeSend: function() {
        $('#result').html('Processing...');
      },
      success: function(data) {
        $('#result').html('Done!');
      }
    });
  });
});
Ok, after you click the “Generate” button, a request should be sent.
As you can guess, our server will hang for 30 seconds. Yeah… we need to collect a lot of data and upload a file, that’s pretty big! At the end, we must display the file’s url! If you use Heroku, your process will be killed by rack-timeout so a user will never get a link to the file, that’s really bad!

Yeah… after 30 seconds we finally got the url!

It doesn’t look good, we need to refactor it! We will do it with Pusher!
Sidekiq with Pusher
I described Pusher above. Now, we just need to add it to our application. Update Gemfile then we need to include a Ruby implementation – server side, as well as an implementation in JavaScript, for the client side. Since we’ll keep some sensitive information, it’s good idea also to add the Dotenv gem but be careful – it’s must be added just after Rails gem, because it loads all environment variables.
..

gem 'rails', '~> 5.1.4'
gem 'dotenv-rails', '~> 2.2.1'

...

gem 'pusher'
gem 'rails-assets-pusher', source: 'https://rails-assets.org'
Now run bundler to install everything:
$ bundle install
If you have any problems during the installation process, remove Gemfile.lock and rerun it.

Now you need to create an account at Pusher. Please go to https://pusher.com/ and log in with Github/Google or create a new account. After you log in, create a new application, front-end: JQuery / back-end: Ruby/Rails and get your keys and add them to .env file, for example:
PUSHER_APP_ID=11111
PUSHER_KEY=efwq3fewfsdf
PUSHER_SECRET=rewfwrgf
Pusher is already installed and we have our keys, so we need to load them in our application. Create an initializer under the config/initializers:
require 'pusher'

Pusher.app_id = ENV.fetch('PUSHER_APP_ID')
Pusher.key = ENV.fetch('PUSHER_KEY')
Pusher.secret = ENV.fetch('PUSHER_SECRET')
Pusher.cluster = 'eu'
Pusher.logger = Rails.logger
Pusher.encrypted = true
Great, everything is configured properly! Now we can finally change our application’s logic and write some code to use Pusher. Let’s update our FileGenerator logic. What do we want to achieve here? We just want to to create a Sidekiq job, which will handle everything in the background for us, so a POST request won’t take 30 seconds, but about 3 milliseconds.
class FileGenerator
  def call
    GeneratorWorker.perform_async
  end
end
Now we need to implement all the logic in the GeneratorWorker. What will we do here? We’ll process all the logic plus perform all heavy and time consuming operations. Another important thing is that, we need to pass the result of the our operation, a generated file URL, to the front-end.
How can we do it? We need a trigger pusher action in the specific channel. What is a channel? A channel is like a room, to which we need to connect. If we connect to this room, we can perform any action we like. Basically an action is like a room, inside a big room.
So let’s create a channel with name as conversation-1 (id of a conversation from a database for example) and create actions like send-message. All of these actions will be available for clients which have connected to this specific room. For each feature, you should have a separate channel, unique for each user, a group of users etc.
Moreover, Pusher offers something like private channels, so channels to which access is accessible only if you are authorized – for example for admins, each user etc.
What we need to add is something like this (just pick some random name since we have only one channel and action):
Pusher.trigger('my-channel', 'generate', {
  url: 'http://example.com/file.pdf'
})
By adding url to the 3rd parameter, we pass it to the front-end. So your worker should looks like:
class GeneratorWorker
  include Sidekiq::Worker

  def perform(*args)
    # imagine heavy sql queries, data processing
    sleep(30)

    Pusher.trigger('my-channel', 'generate', {
      url: 'http://example.com/file.pdf'
    })
  end
end
Now, we need to implement our feature on the client-side. First, let’s include the pusher library in the application by adding it to the application.js file. Then we need to create an instance of pusher client. Remember to add you application key! Great, we have the pusher client ready, next we need to subscribe to our channel. How can we do it? It’s really simple, we need to subscribe to a specified channel, like:
var channel = pusher.subscribe('my-channel');If we want to get a data from a specified action when it will be triggered, we should add something like:
channel.bind('generate', function(data) {
  $('#result').html(data.url);
 });
In this case, after a server-side sends something to the client-side, we can do with it whatever we want.
//= require rails-ujs
//= require pusher
//= require jquery
//= require jquery_ujs
//= require_tree .
Pusher.logToConsole = true;
var pusher = new Pusher('your_key', {
cluster: 'eu',
encrypted: true
});
$(document).on('ready', function() {
$('#generate_data').click(function(event) {
var channel = pusher.subscribe('my-channel');
event.preventDefault();
$.ajax({
method: 'GET',
url: '/home/generate',
beforeSend: function() {
$('#result').html('Processing...');
},
success: function(data) {
channel.bind('generate', function(data) {
$('#result').html(data.url);
});
}
});
});
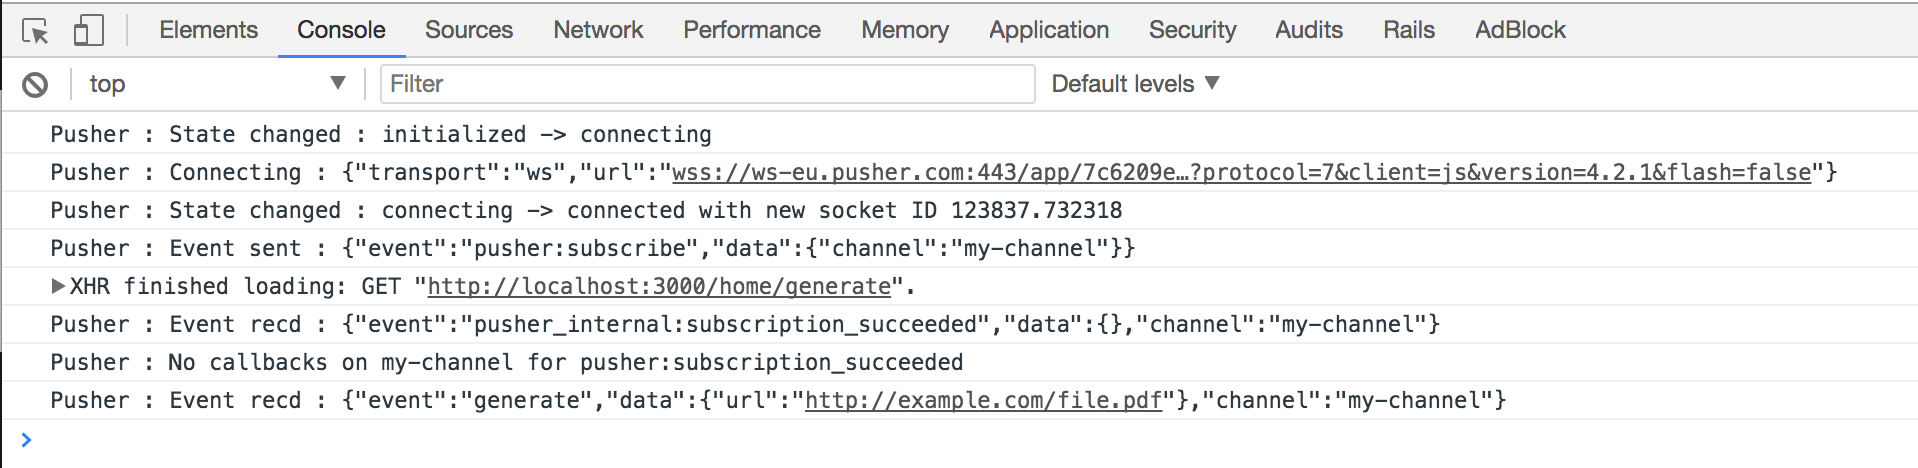
});I also added an ability to log everything to the browser console, to be sure that everything is fine.
Pusher.logToConsole = true;
Now, we should restart Foreman, because we changed the worker and added environment variables. When you try to run a worker again, by clicking the button, you willsee something like:

Yeah, because of Sidekiq and the job in the background our request took only 4 milliseconds! Pretty good, right?! Yeah, our application’s requests are no longer blocked and stuck!

As you can see, it took 30 seconds to execute our job.
You can check everything in the browser’s console, what’s going on and debug your channels. It’s really great!
Summary
I hope that this tutorial will be usefull for you and reading it will help you improve your application features and make them faster and more reliable. If you have any questions, feel free to leave a comment below. Thank you for reading!